You can create and plan a new live show either directly in the LIVEBUY Dashboard or via the Creator App. This article explains how merchants can plan a live show using the Dashboard.
Create a New Live Show
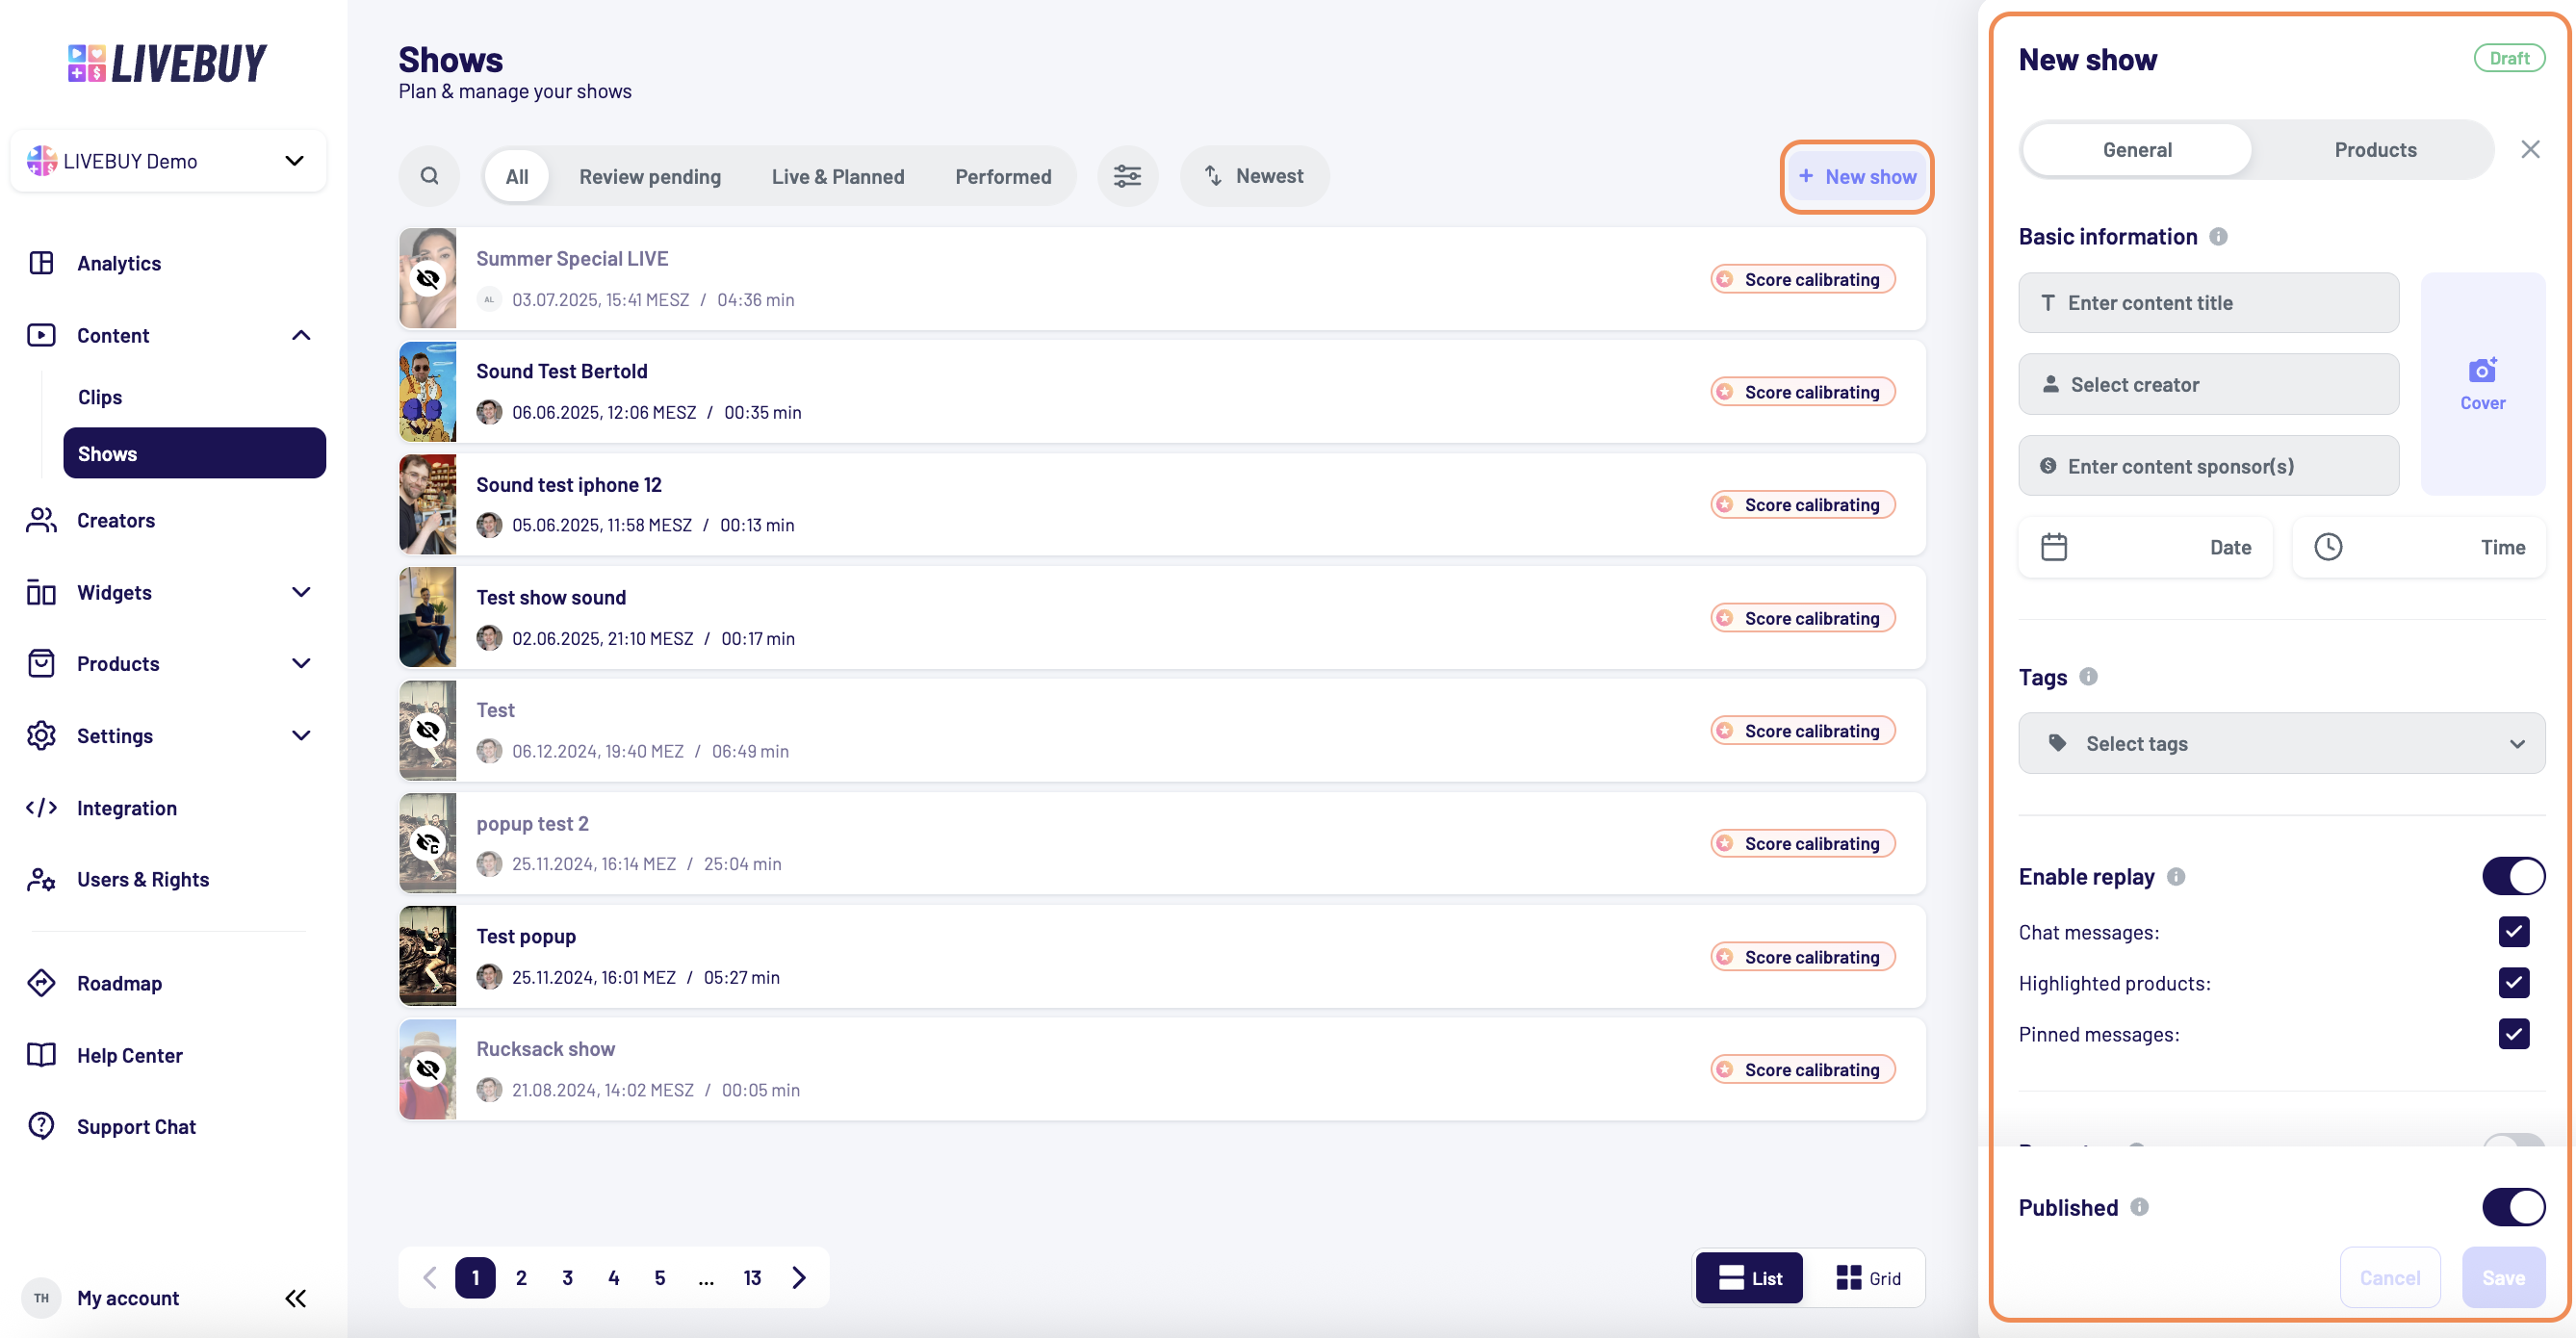
To plan a new live show, navigate to Content > Shows in the LIVEBUY Dashboard and click “+ New Show” in the top-right corner of the show overview.
A panel opens on the right side, creating a draft for your planned live show. The draft contains two tabs (General & Products) that guide you through the setup process.
General Tab
The General tab contains all basic information for your live show.
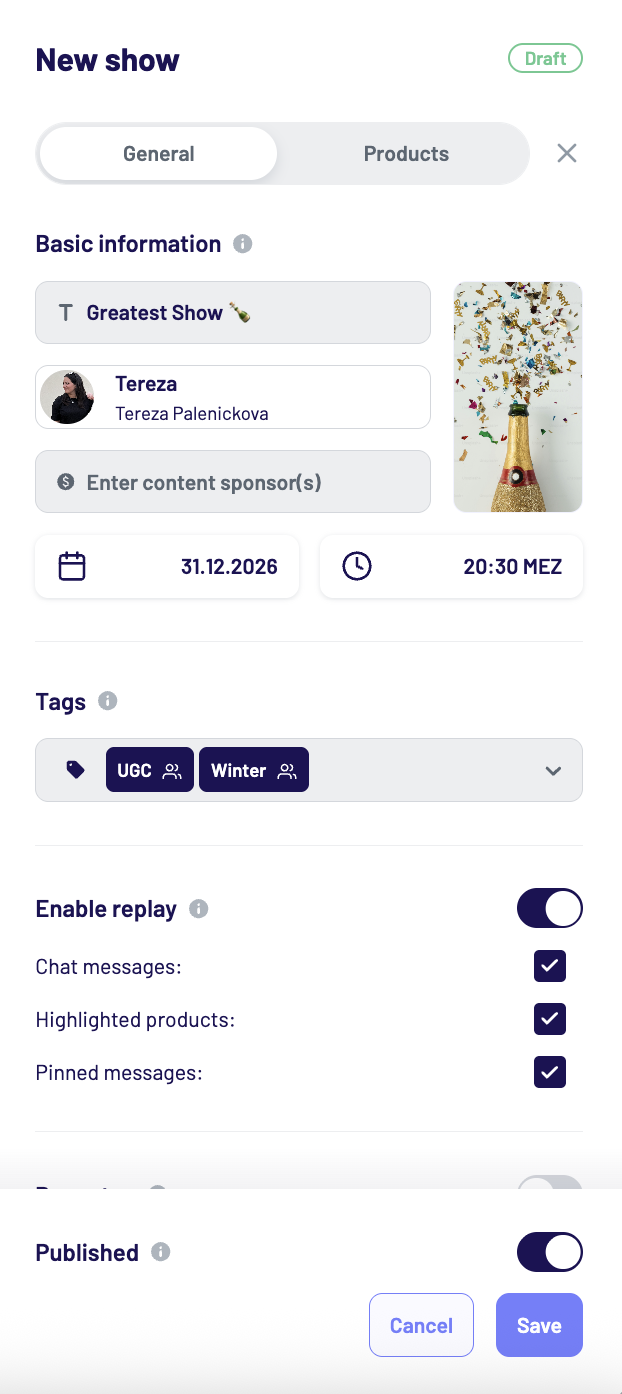
Required Information
-
Content title
The title of your live show (max. 100 characters). Depending on widget settings and device size, the title may be truncated or not displayed everywhere. Emojis are supported. -
Creator
Select the creator who will host the live show. The creator can be changed until the show has been broadcast. -
Date & time
Set the planned start date and time of the live show in your shop’s timezone.
Optional Information
-
Sponsor(s)
Add sponsorship information if required (max. 255 characters). This helps you comply with advertising and transparency requirements. Whatever you enter in the Sponsored by field will be displayed to viewers in the video player under “About this video” -
Cover image
Upload a custom cover image for promoting the live show in widgets (max. 2 MB).-
Note: Recommended size: 292x512 pixels and a 9:16 format.
If no image is uploaded: -
Live shows use the creator’s fallback cover image if available
-
Otherwise, the creator’s profile picture is used
-
Tags
Add or remove tags by typing the tag name.
Tags with a creator icon are also available to creators. Tags can be edited before and after going live.
Replay Settings
Enable or disable the replay and configure which elements should be visible in the replay, such as:
-
Chat messages
-
Highlighted products
-
Pinned messages
By default, replay is enabled using the replay settings as defined in the Clips & Replays Settings section. Replays allow viewers to watch the show and shop products after the live broadcast has ended.
Enable Pro Setup if you want to stream using external software (e.g. OBS).
When enabled:
-
The show is not available in the Creator App
-
Pro Setup enables the possibility of 16:9, 1:1 and other formats in the player
-
You receive one RTMP streaming URL and two stream keys:
-
One for the public live show
-
One for a private practice stream
The RTMP URL is the same for both streams.
-
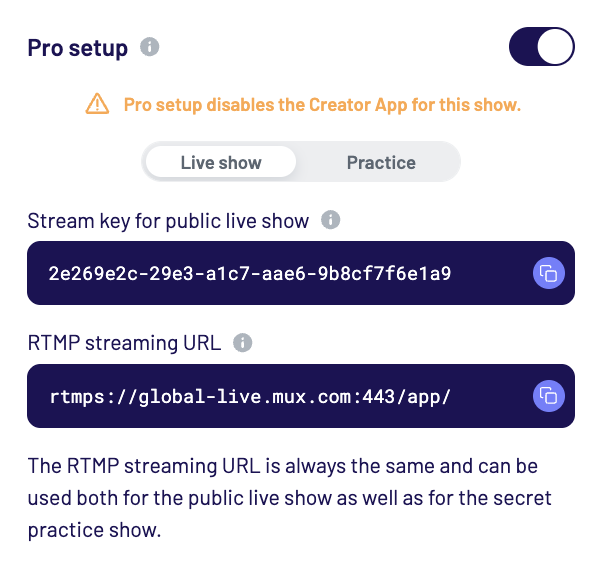
Learn more about the Pro Setup in the Pro Setup Stream (OBS) article.
Cache the show
Click Save to store your general information.
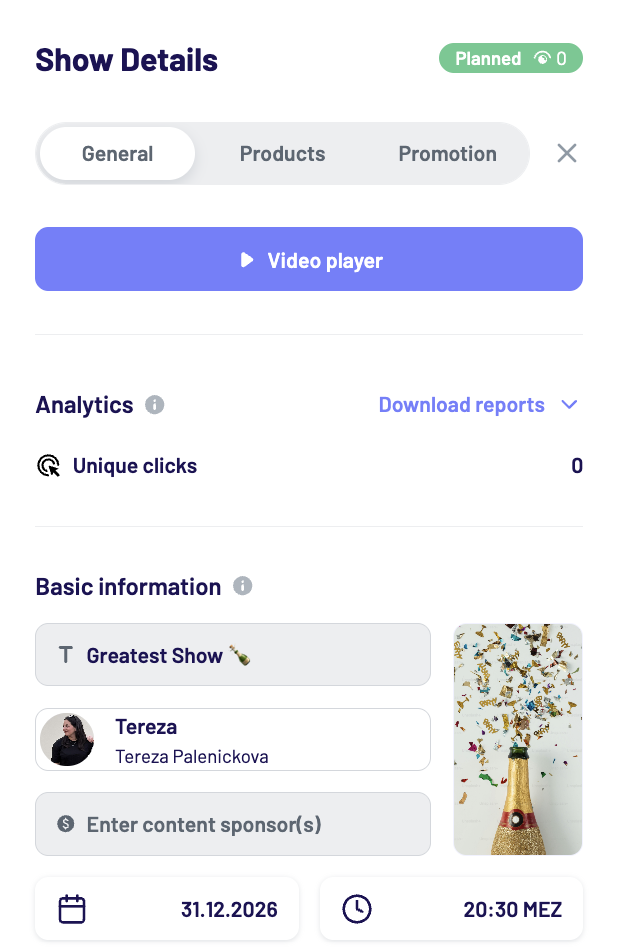
Once saved, the show status changes from Draft to Planned, and additional sections become available, including:
-
Promotion
-
Analytics
-
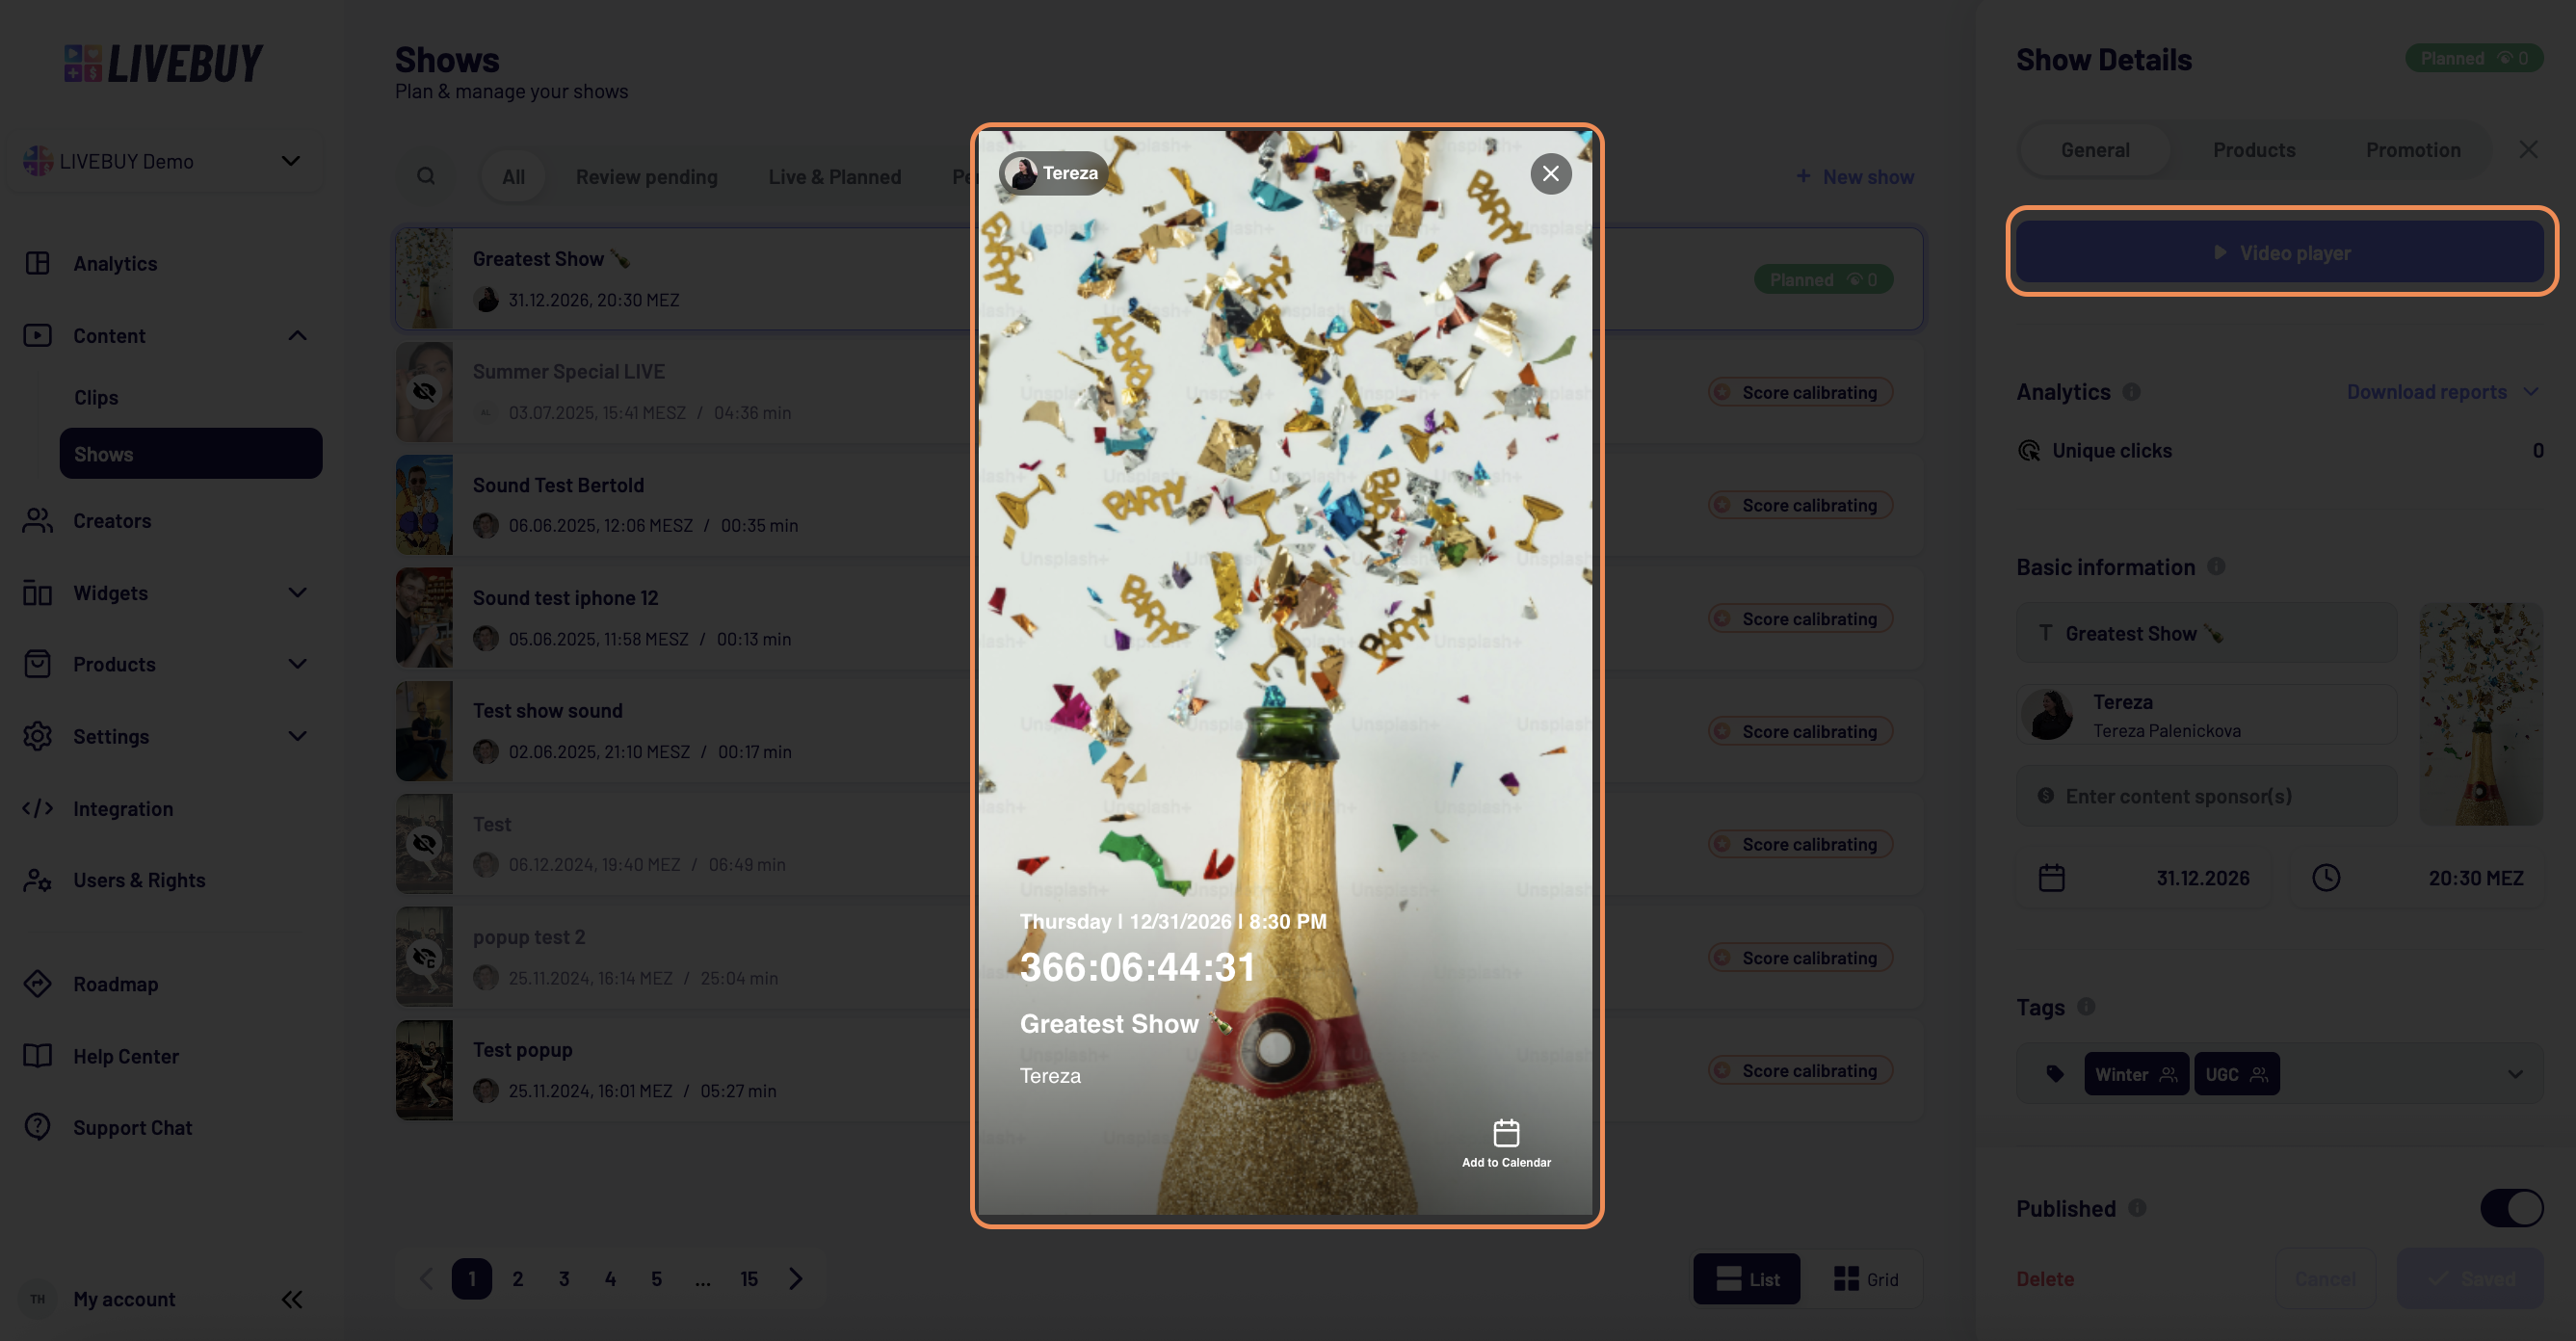
A shortcut to the Video Player
By clicking on the Video Player you can open the Pre-Show-Screen in the Player. This is the screen your viewers can see before the show starts.
Products Tab
In the Products tab, you can add products that will be featured during the live show. Learn more in the Products Tab article.
Promotion Tab
After saving your show, the Promotion tab becomes available. Read more about the promotion options in the Promotion Tab article.
Publish the Show
Once all configurations are complete:
-
Enable the Publish toggle
-
Click Save
After publishing, your show can appear in widgets, embedded locations, and can be accessed directly via autoplay links.
Your show is now ready to engage shoppers across your LIVEBUY experience.
Final Step
Click Save once more to store all products, settings, and configurations.
Your live show is now fully planned and ready — have a great live show!