Enable Pro-Setup for your show
-
Go to the LIVEBUY Dashboard and log in
-
Create a new show
-
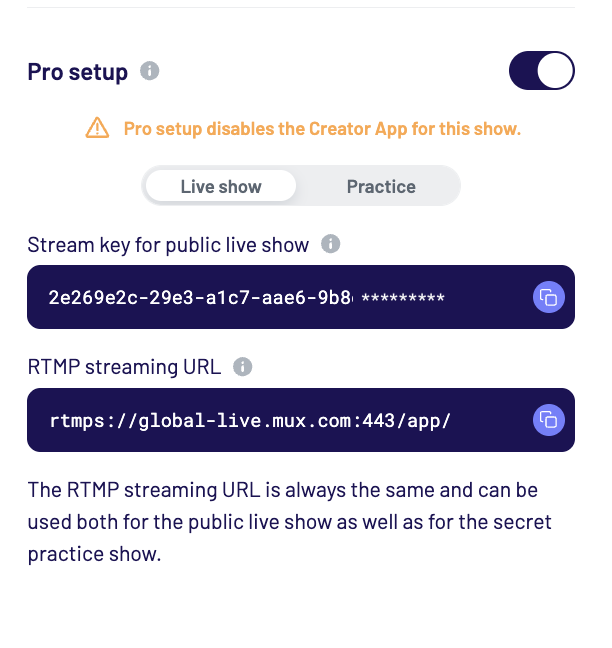
In the show creation panel on the right, scroll down and activate the Pro setup toggle switch
-
The Pro setup information appears in two tabs (Live show & Practice)
-
Fill in all the required show information and save the show.
-
Now you see a URL in the two boxes.
-
The live show tab contains the streaming information for a live show (visible to the public), whereas the practice tab contains the streaming data to do a test run of your show.
-
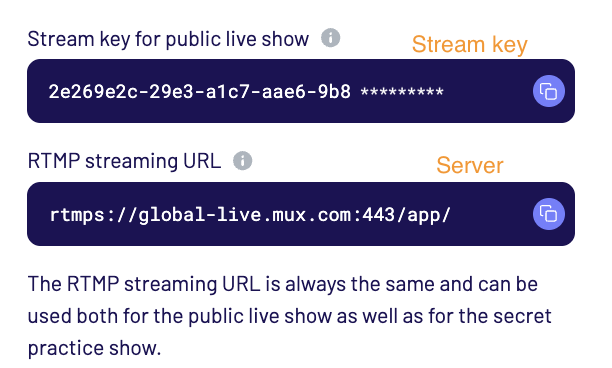
The streaming information is a URL that consists of two parts:
-
The Server is the same for both the live show and the test run but the Stream Key is different.
-
To go live, please copy the streaming information and switch to your 3rd party streaming software.
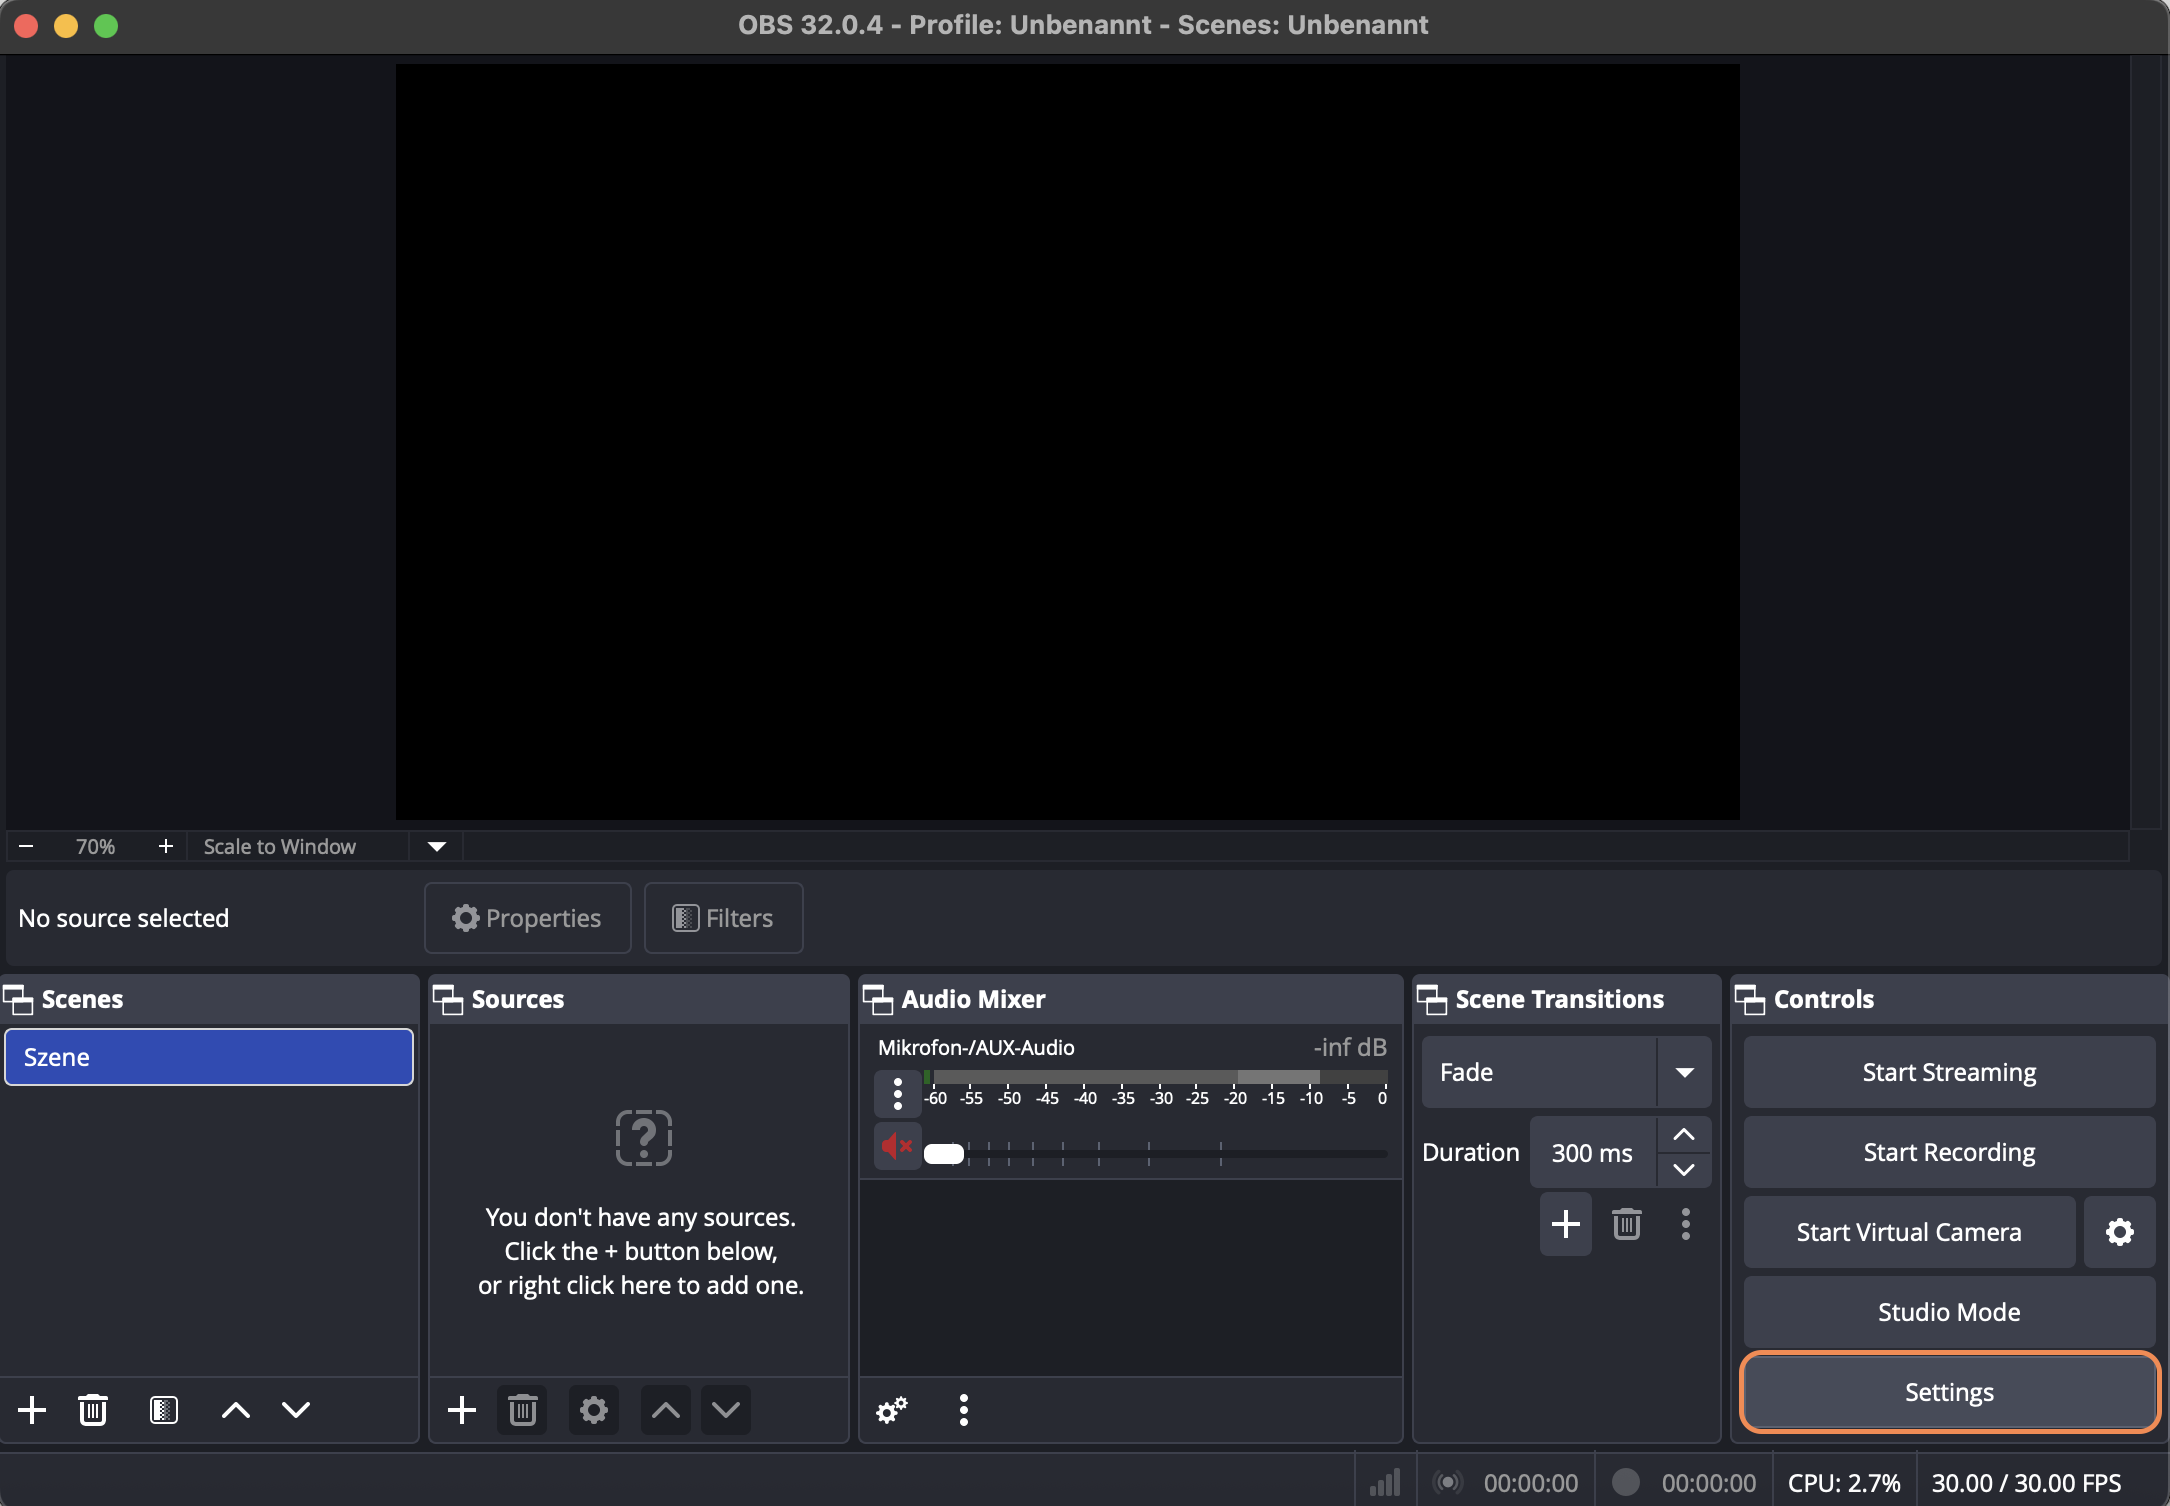
Set up your 3rd party streaming software (e.g. OBS) for streaming.
-
Inside your streaming software, go to settings
-
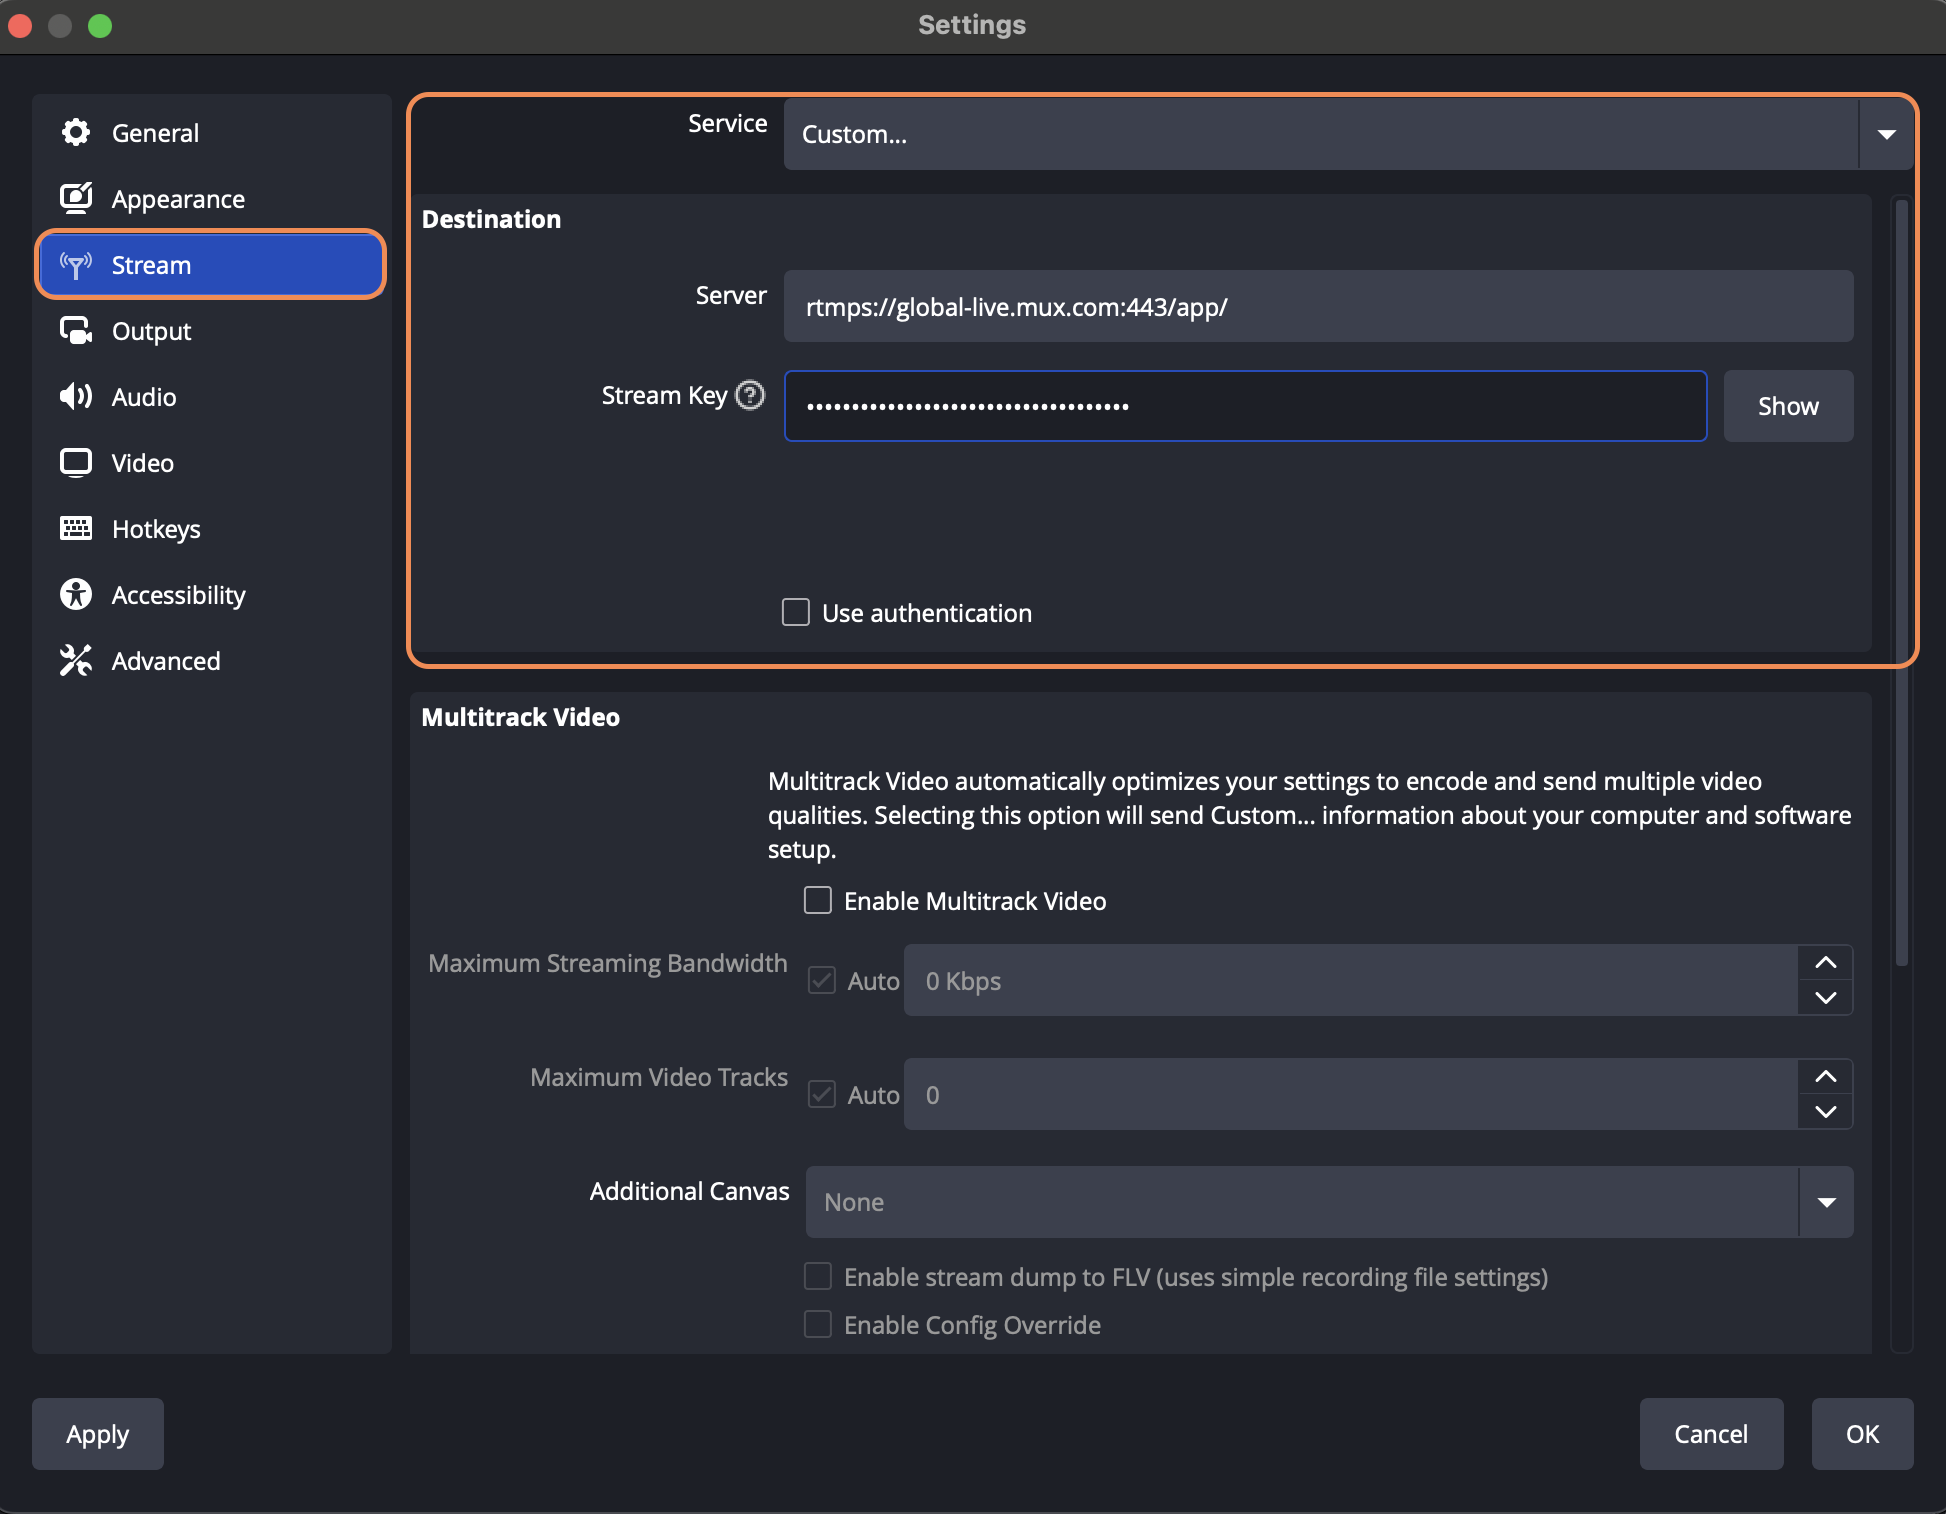
and then to "Stream"
-
Select "Service: Custom..." and enter the streaming information
-
Click OK to save the changes.
-
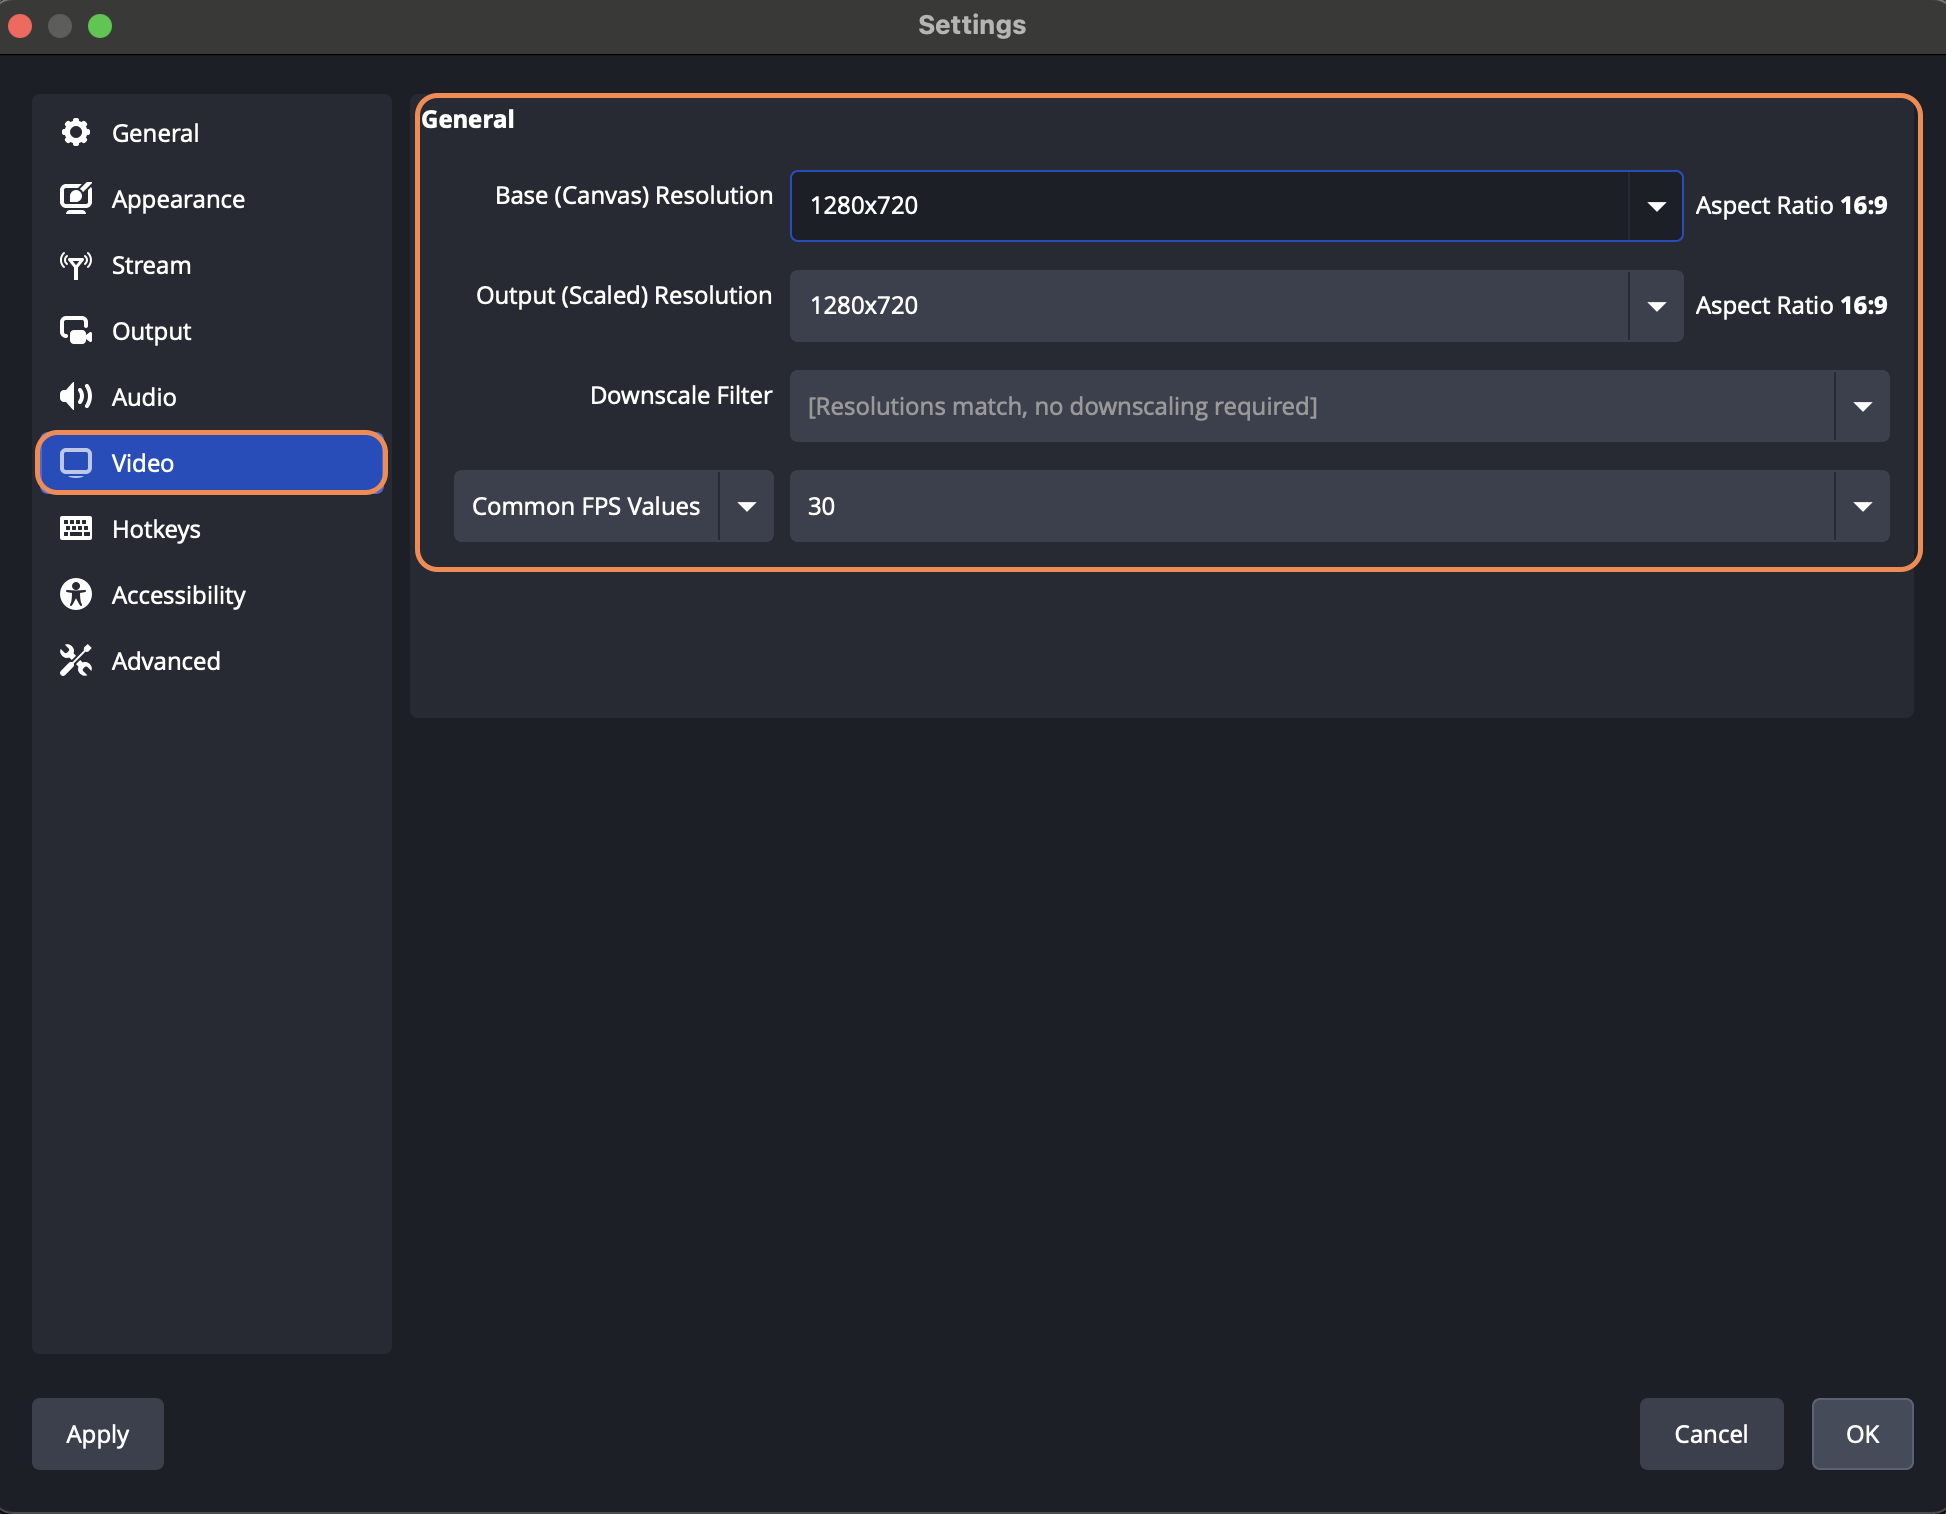
Bonus: While in the settings, navigate to "Video" and ensure that the output format is set up correctly (e.g. 720x1280 @ 30fps for portrait format streaming which we recommend for best viewer experience ). Press OK to save the settings.
Set up your OBS stream
Please refer to the OBS documentation for a detailed explanation of how to set up "Scenes" and "Sources" for a live stream.
As an example of how to stream a pre-recorded video:
-
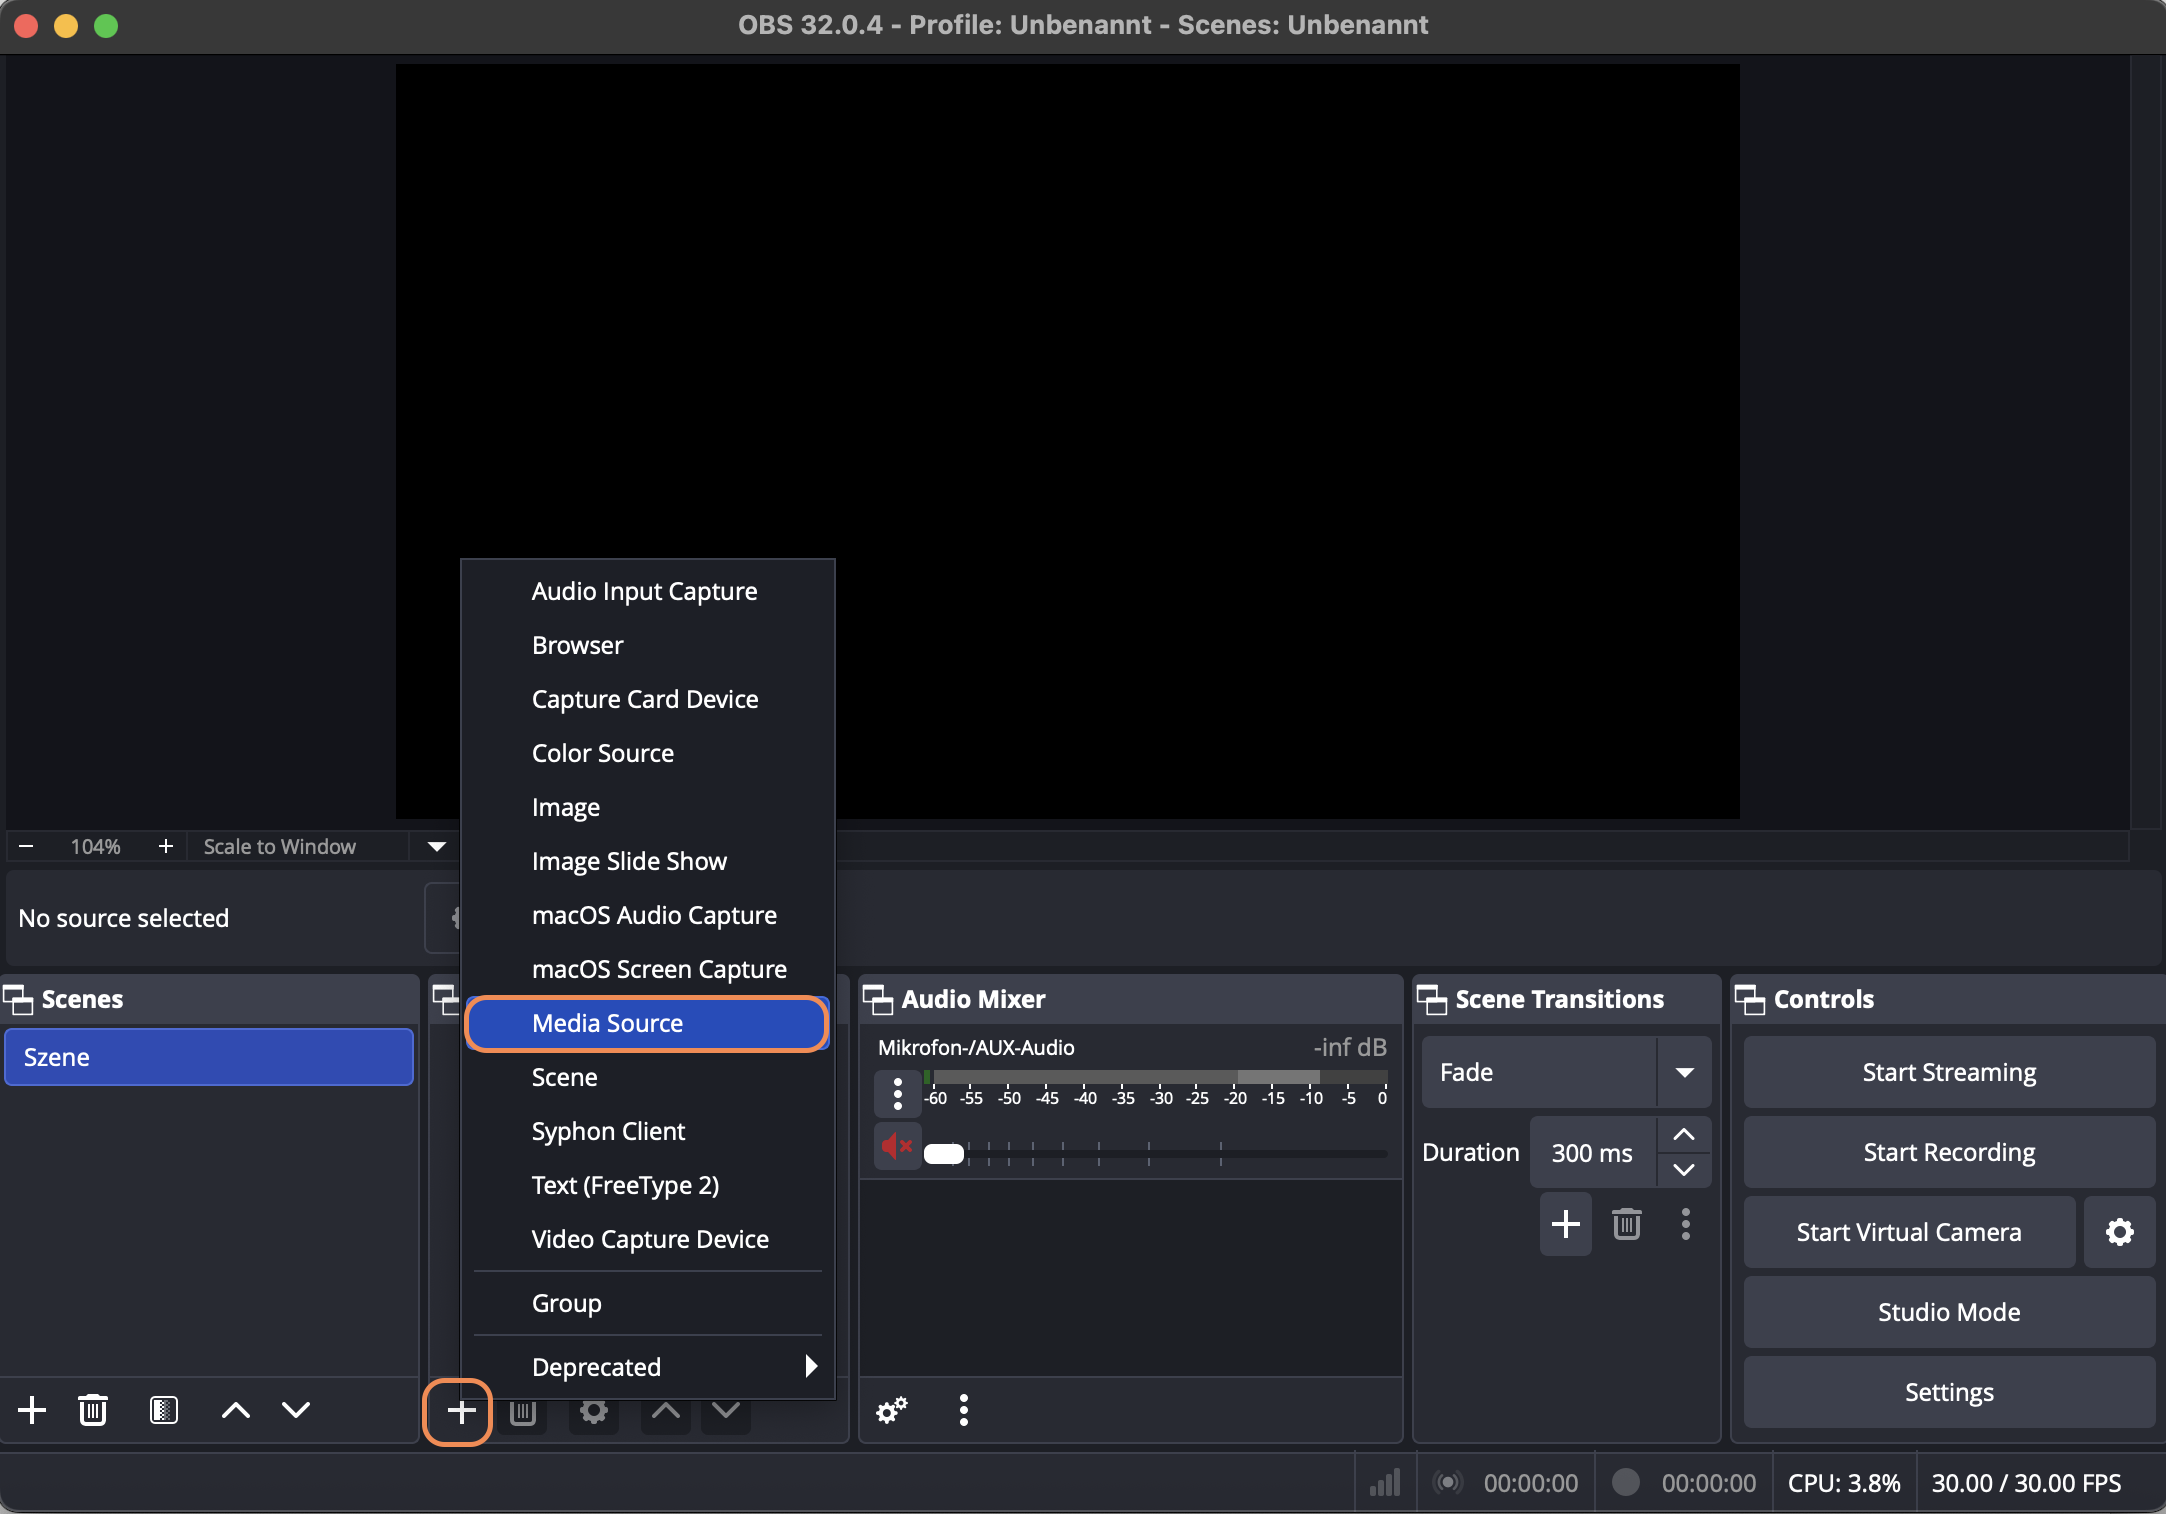
After creating a scene, click on the "+" in the "Sources" area and select "Media Source"
-
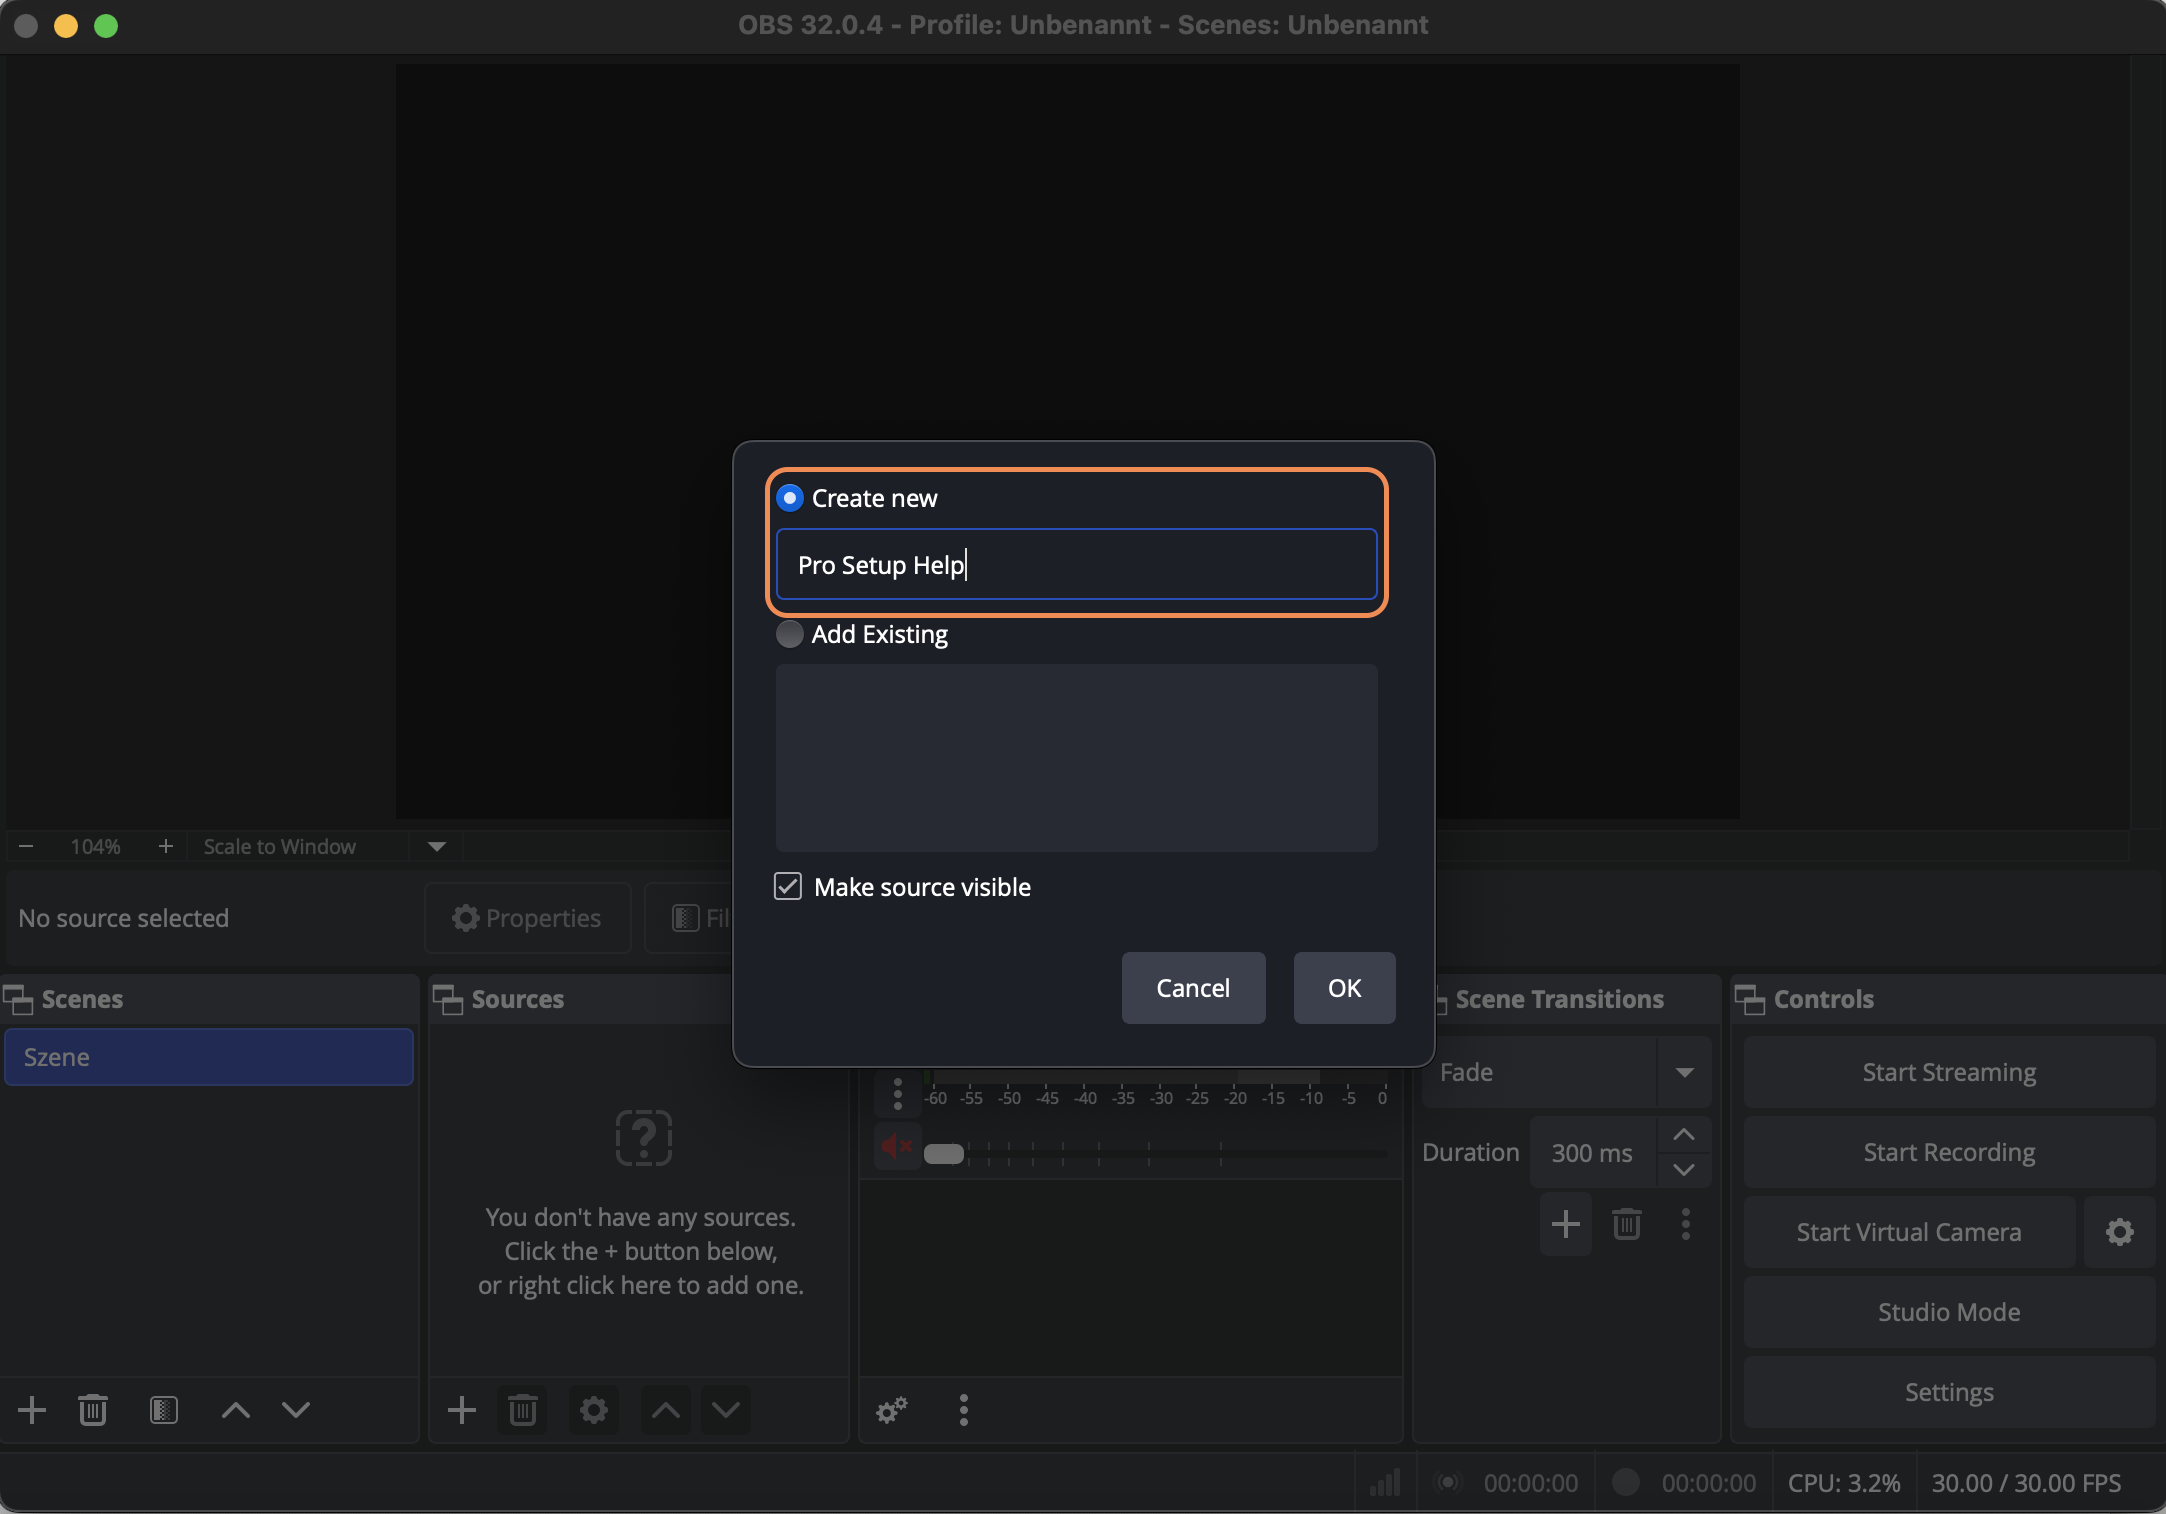
Give the Media Source a name and click "OK".
-
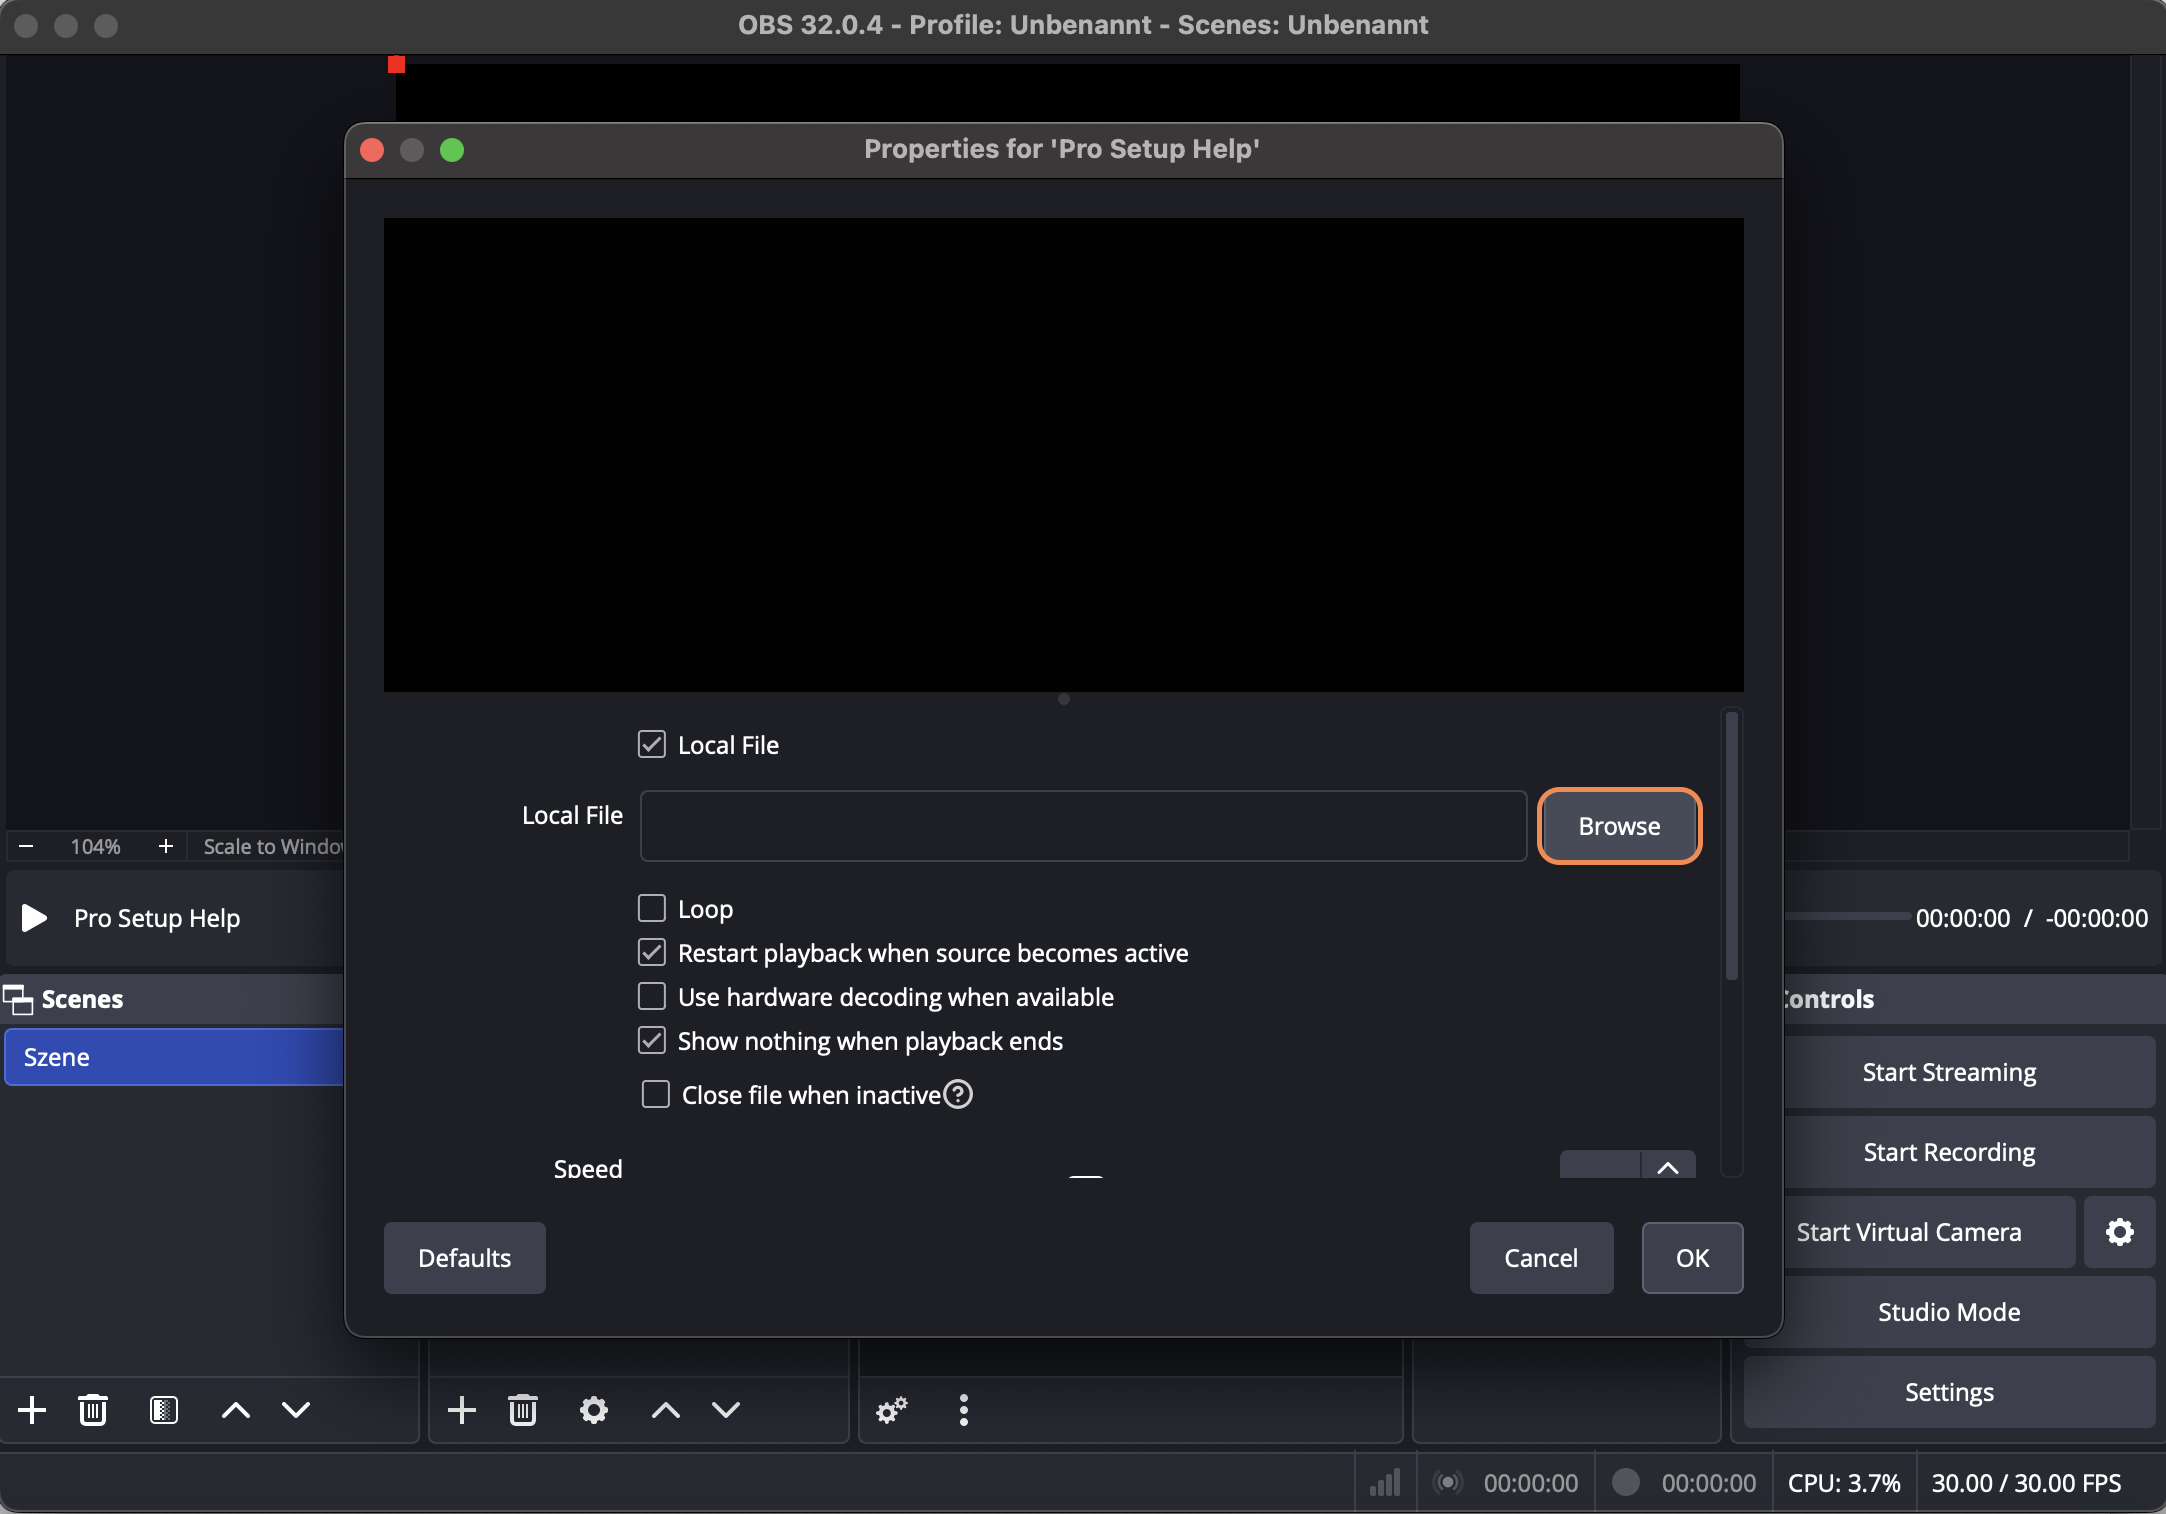
Click on "Browse" to select a video file from your computer and click OK.
-
The file loads up and starts playing. Don't worry, you are not streaming yet. You can use the red frame around the video to adjust the size and make sure that it fits onto the canvas. Also, check if you have sound in the "Audi Mixer" section from the video and adjust the level if necessary.
-
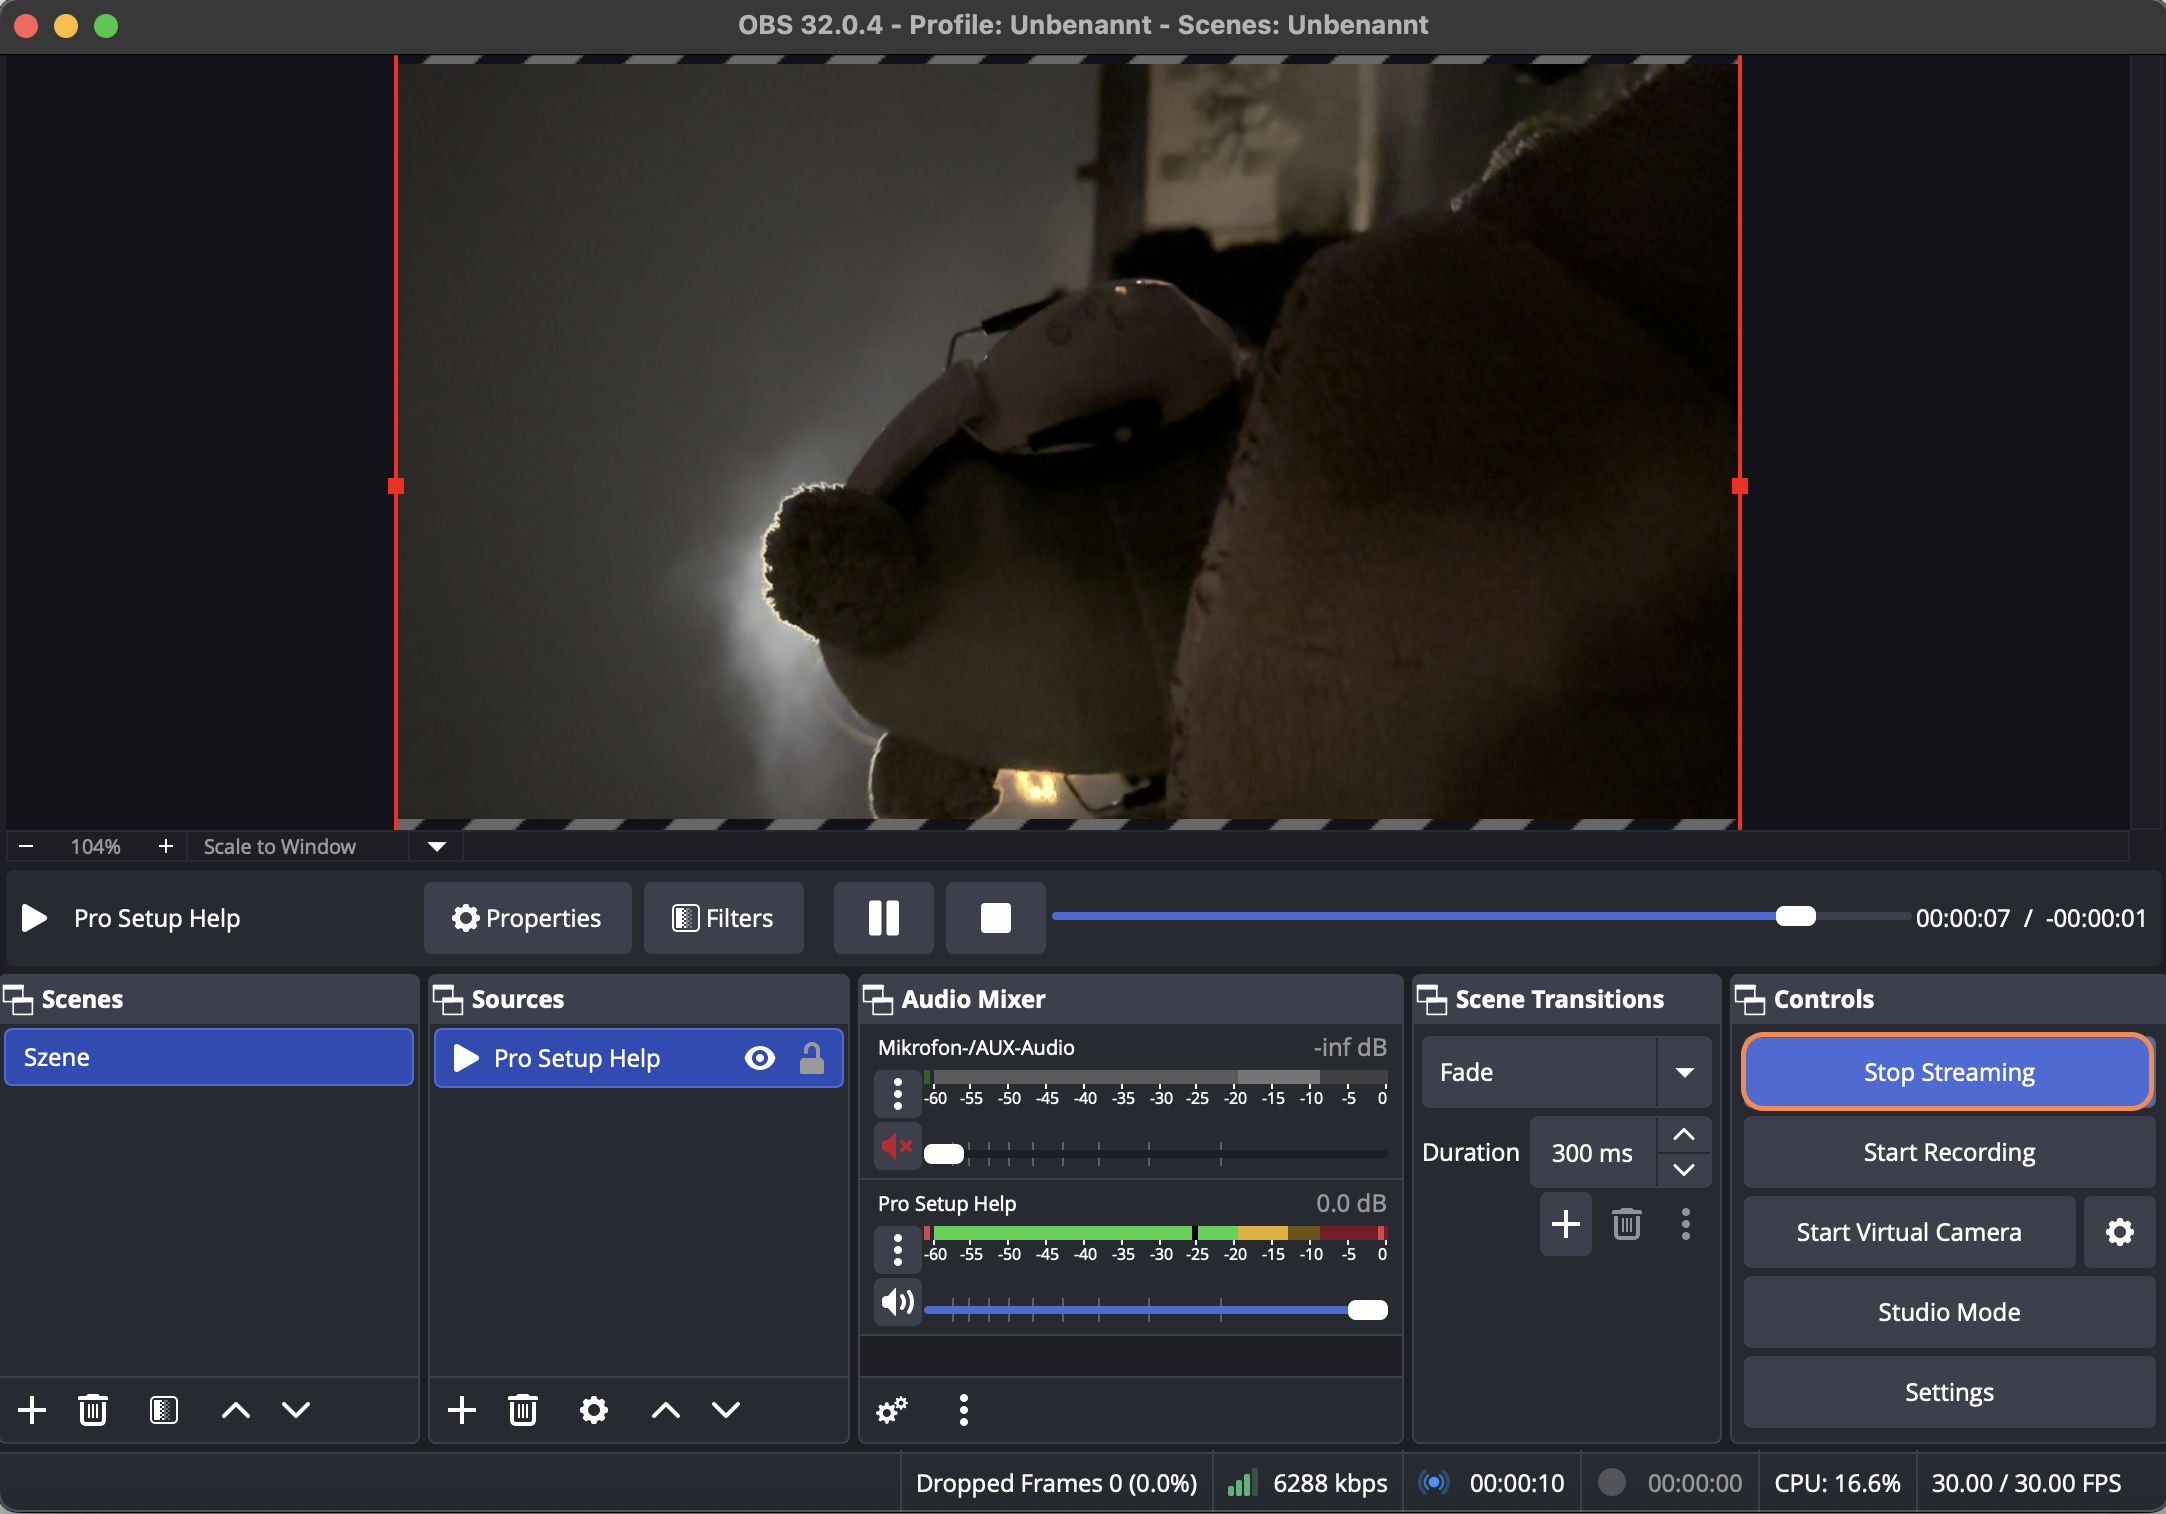
Once you have everything configured correctly, press the square "Stop" (1) button in the transport area of the video to bring the video back to the beginning. When you are completely ready and prepared to start streaming, press "Start Streaming" (2). OBS will establish a connection to the server and start streaming. Now quickly press the "Replay" (3) button in the transport area of the video, and start playing the video again.

-
The video is now being streamed live to the internet and viewers can watch it through the LIVEBUY player inside your shop.
-
When you want to stop the stream (e.g. when the video is over), simply press "Stop Streaming" and the connection will be cut immediately. Since there is a streaming delay of about 15 seconds, viewers will still be able to watch the last 15 seconds that you recorded after you pressed "Stop Streaming". They are 15 seconds "behind" so to speak.
-
Once the stream has ended, the Replay will automatically be made available inside your shop after 10 minutes, if you have enabled a replay for that show in the LIVEBUY Dashboard.