Custom Pages Widgets are widgets that always display the same content, regardless of where they are implemented in your shop. They are ideal for curated sections, landing pages, or static placements where the content should not change based on page context.
To manage your Custom Pages Widgets, go to Widgets Custom Pages in the LIVEBUY Dashboard.
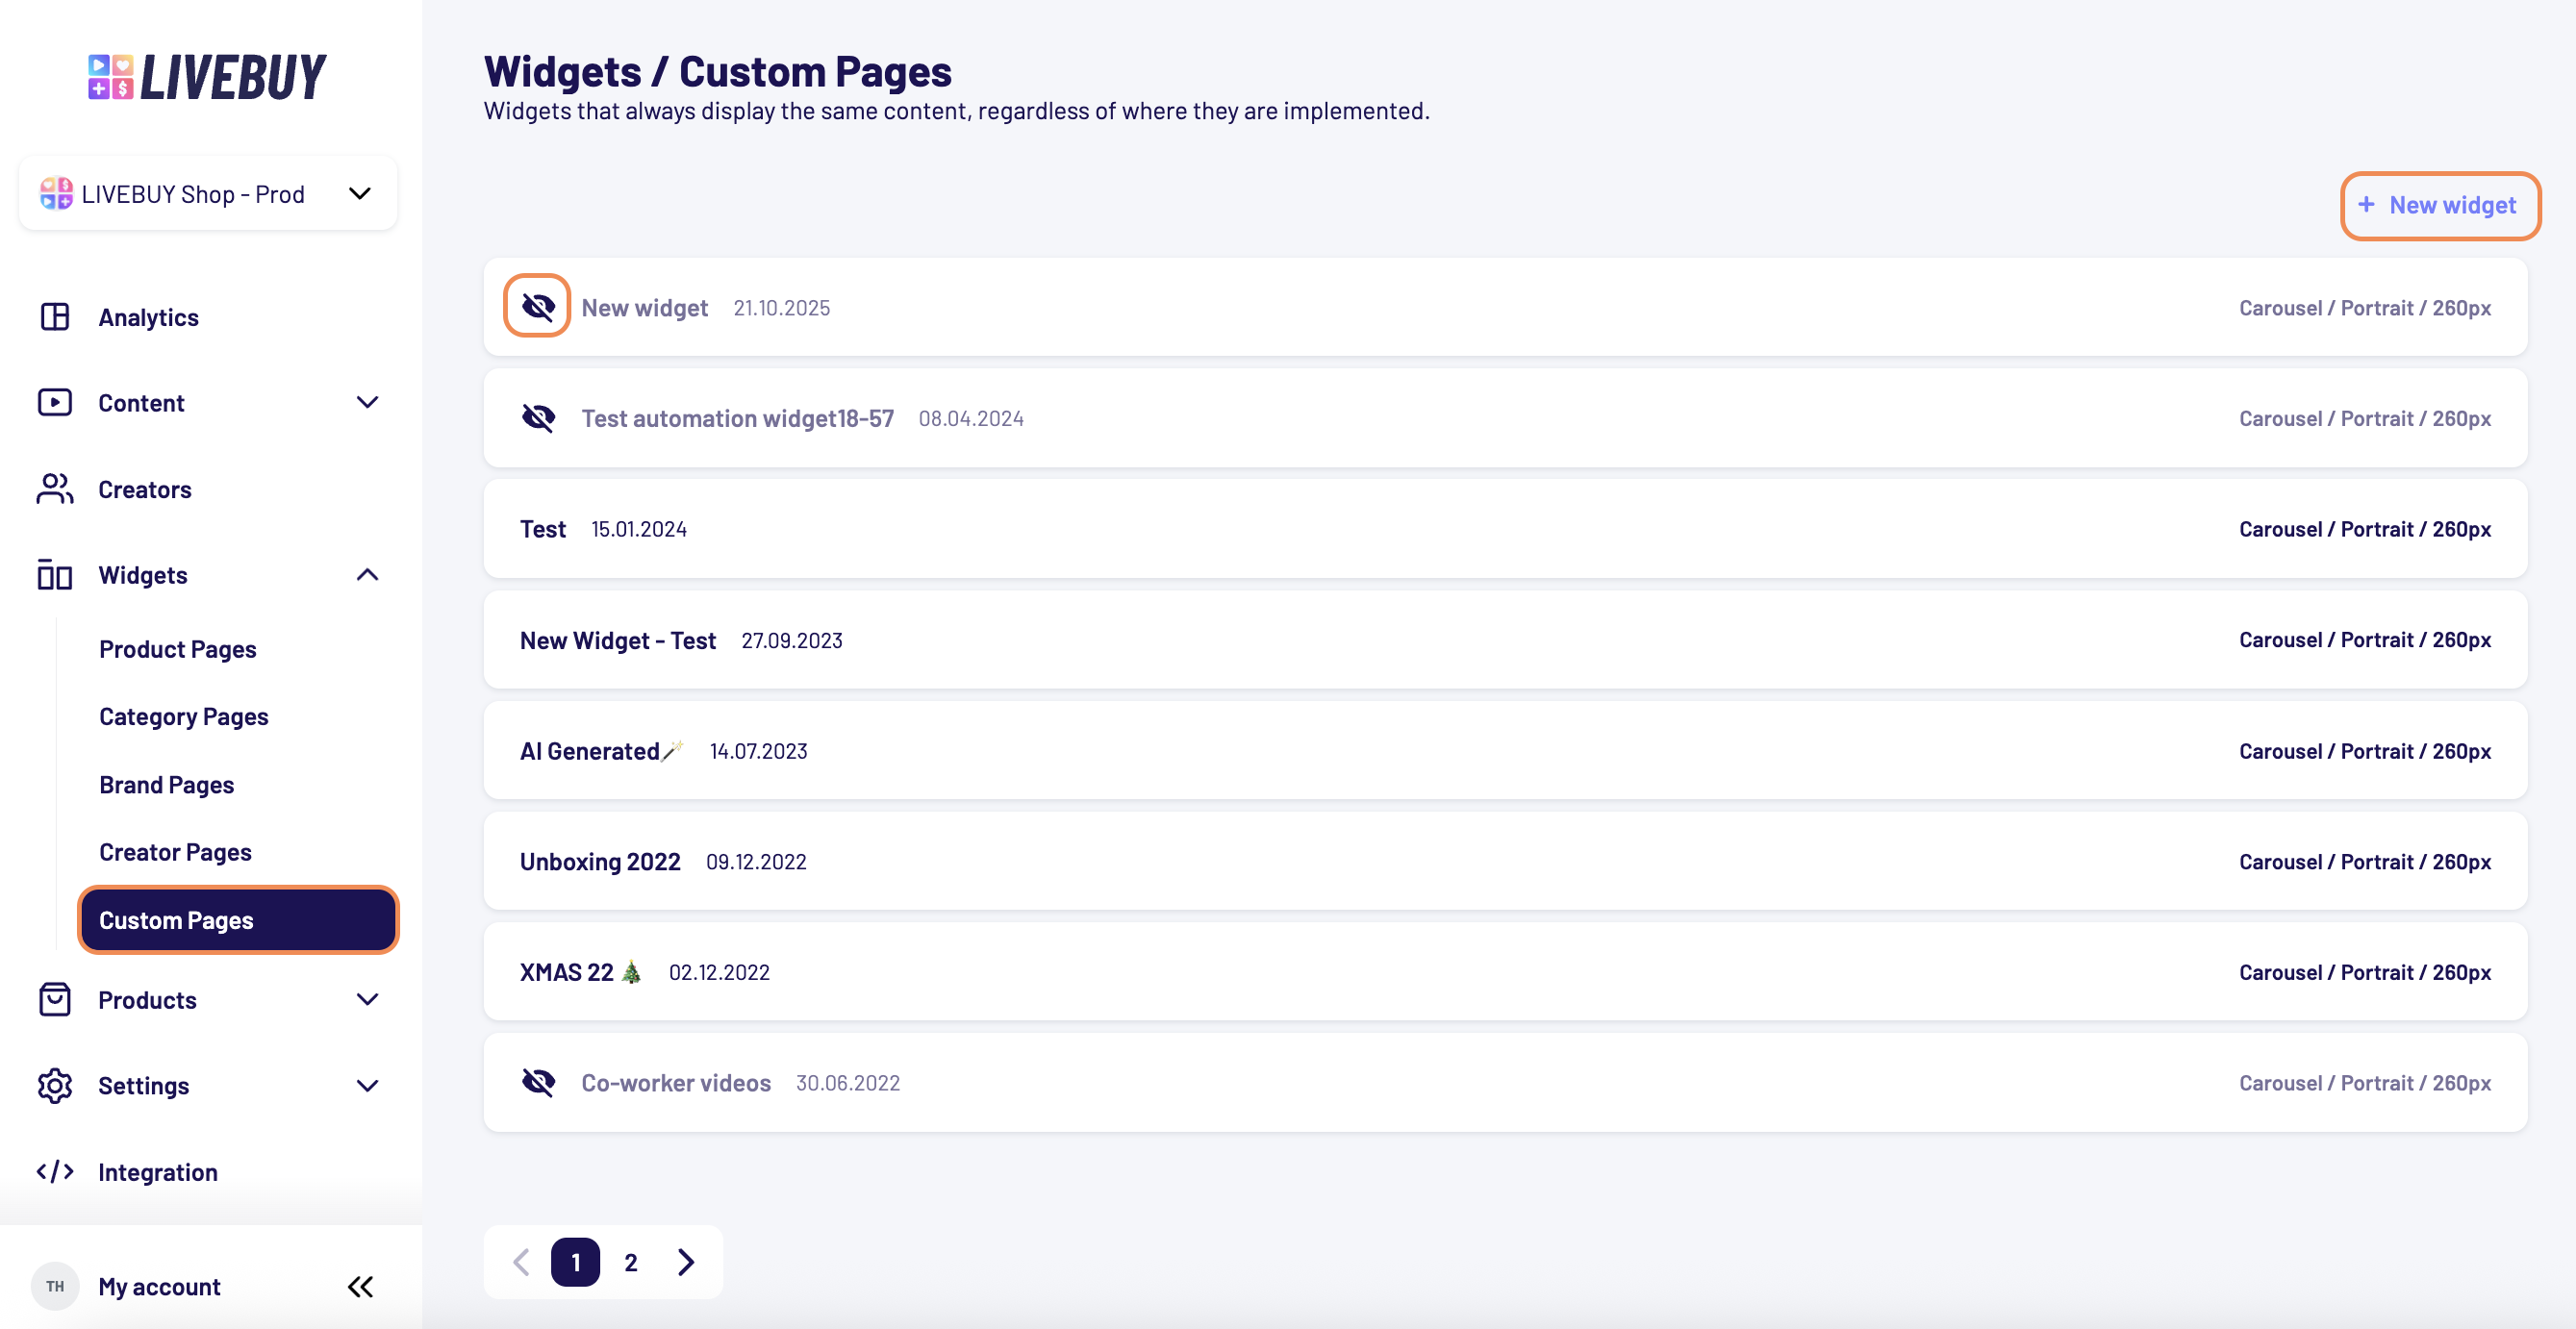
Custom Pages Widget Overview
In the Custom Pages Widget overview, you can see all widgets that have been created for custom pages.
The overview displays:
-
A list of all created widgets
-
Widget name (internal only)
-
Status
-
Unpublished widgets are marked with a crossed-out eye icon
-
Published widgets are shown without a special icon
-
-
Date of creation
-
Style information, including:
-
Widget type
-
Cover shape
-
Size
-
From this overview, you can open, edit, or manage existing widgets at any time.
Creating a New Custom Pages Widget
Click Add new widget to create a new Custom Pages Widget.
This opens a newly created widget along with a configuration panel on the right, prefilled with your default widget settings.
Naming Your Widget
Above the widget preview (placeholder with text “No content available based on your current configuration”).
Here, you can edit the widget name.
-
The widget name is used only for internal identification
-
It is never displayed in your online shop
-
Choose a name that helps you easily identify and differentiate this widget from others
To edit the name:
-
Click on the widget name to enter edit mode
-
Change the name
-
Click save on the buttom right in the panel to save the widget name
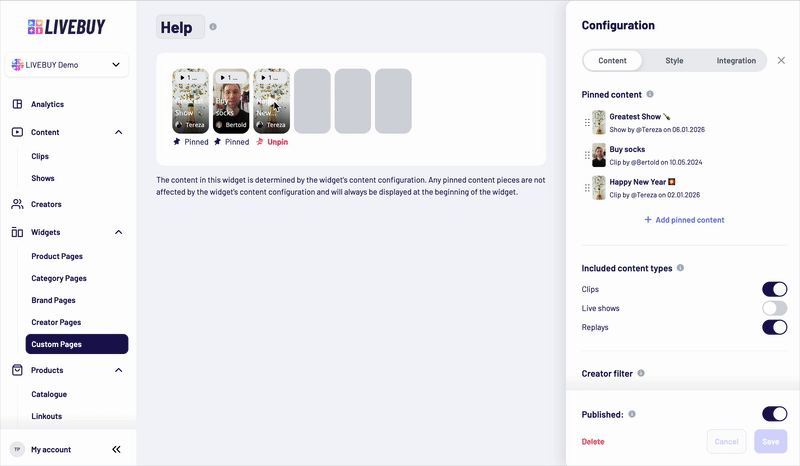
Widget Configuration Tabs
After naming the widget, configure it using the three tabs in the right-hand panel:
-
Content
-
Style
-
Integration
You can see all configuration changes reflected live in the preview below the widget name.
Content Tab
The Content tab defines which content is displayed in your widget. To learn more about the content in your widgets please switch to the Widget Content Tab article.
Pinned Content
Pinned content is always shown before all filtered content and is not affected by filters or sorting. Learn how to pin your content in the Pinned Content article.
Style Tab
In the Style tab, you can fully customize the appearance of your widget, including:
-
Widget type (Carousel or Inline)
-
Cover shape (Portrait, Square, Circle)
-
Height and border radius
-
Animations and play button
-
Overlay and count display
-
Alignment and badges
-
Creator icon visibility
-
Text styling for headline, title, badge, and creator name
For detailed styling options, see the Carousel Widget Settings article.
Integration Tab
In the Integration tab, you’ll find two embed code options. For more details please switch to the Widet Integration Tab article.
Editing Existing Custom Pages Widgets
You can edit existing Custom Pages Widgets at any time.
To edit a widget:
-
Go to Widgets - Custom Pages
-
Click on the widget you want to edit in the overview
This opens the widget along with the configuration panel on the right.
You can change any part of the widget configuration, including:
-
Content settings (filters, sorting, pinned content)
-
Style settings
-
Integration settings
There is no fixed configuration data for a widget. All settings can be adjusted at any time.
The only value that cannot be changed is the Widget ID, which is automatically generated.
You can find the Widget ID in the URL when the widget is opened.
After making changes, don’t forget to save your widget to apply the updates.
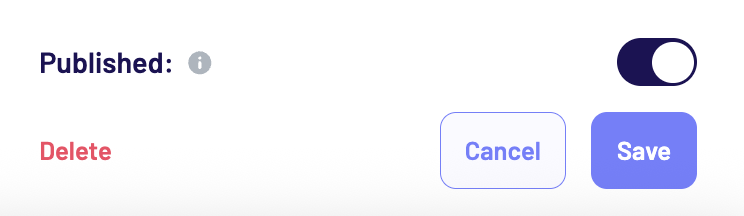
Publishing the Widget
Once your configuration is complete:
-
Enable the Publish toggle (visible in all tabs)
-
Click Save
Your Custom Pages Widget is now ready and can be embedded in your shop.
If you need assistance with your widget configuration or have questions about the best setup for your use case, please don’t hesitate to contact support@livebuy.io. We’re happy to help you optimize your widgets and ensure everything works as expected.