Uploading a Clip in the LIVEBUY Dashboard
There are two ways to upload clips to LIVEBUY:
-
Via the Creator App, typically used by creators without Dashboard access
-
Via the LIVEBUY Dashboard, mainly used by merchants to upload pre-recorded clips
This article explains how to upload and configure a clip directly in the Dashboard.
Step 1: Open the Clips Section
Go to Content Clips in the LIVEBUY Dashboard.
In the Clips overview, click Upload in the top-right corner.
Step 2: Select a Creator & Upload the Video
First, select the creator who will be associated with the clip.
This creator will be displayed in widgets and in the player.
Important: Assigning a creator is mandatory for every clip.
After selecting a creator, the upload dialog opens. You can:
-
Drag and drop a video file, or
-
Select a video file from your device
Once the upload starts, a panel opens on the right side showing the upload and processing progress. After it’s finished, you can begin the configuration.
Clips are unpublished by default and can be published later using the publish toggle.
Clip Configuration Tabs
After the upload is complete, three tabs are available:
-
General
-
Products
-
Promotion
General Tab
In the General tab, you can:
-
Open the Video Player to watch the clip
-
Download the clip to your device
-
View main Analytics or download analytics reports as CSV files
(Learn more in the Manage Clips article.)
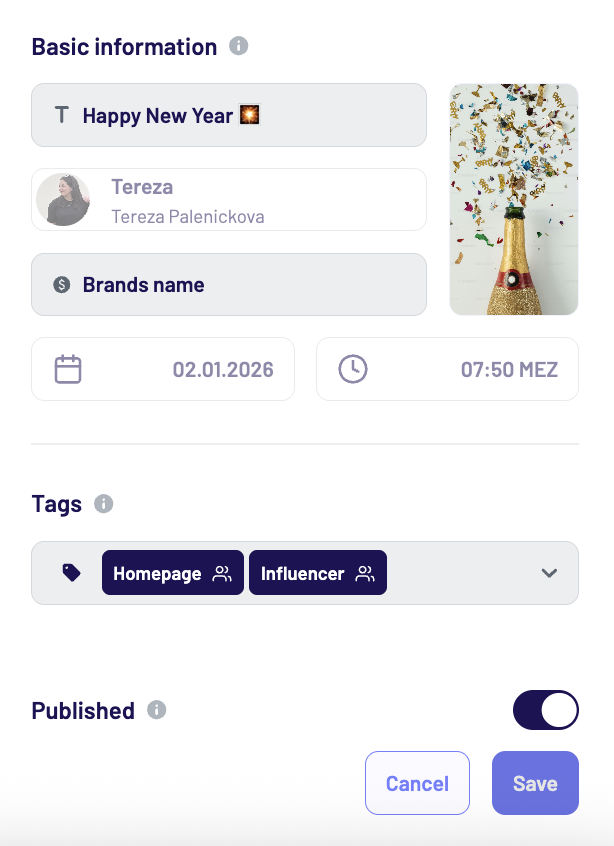
Basic Information
The following fields can be edited, except for Creator and Date & Time.
If changes to these fixed fields are required, please contact LIVEBUY Support with the clip ID (found in the URL) and your requested changes.
-
Content title (mandatory)
Title of the clip (max. 100 characters). Depending on widget and device settings, the title may be truncated or not displayed everywhere. -
Creator (mandatory)
Assigned during upload and displayed in the player and widgets. -
Date & time (mandatory)
Automatically set to the upload date and time in the shop’s timezone. -
Sponsor(s) (optional)
Add sponsorship information if required (max. 255 characters). This helps you comply with advertising and transparency requirements. Whatever you enter in the Sponsored by field will be displayed to viewers in the video player under “About this video” -
Cover image (optional)
Custom cover image for widgets (max. 2 MB).
If no image is uploaded, either an animated thumbnail or the clip’s first frame is used, depending on your shop settings.
You can also add or remove tags in the General tab.
Products Tab
In the Products tab, you can select which products appear in the clip. Learn more in the Product Tab article.
Promotion Tab
The available Promotion tab includes autoplay links, an single embedding code and shop group publishing. Read more about the promotion options in the Promotion Tab article.
Publish the Clip
Once all configurations are complete:
-
Enable the Publish toggle
-
Click Save
After publishing, your clip can appear in widgets, embedded locations, and can be accessed directly via autoplay links.
Your clip is now ready to engage shoppers across your LIVEBUY experience.